
Making the jump to studio portrait photography is easier than it looks. This post will teach you the basics of portrait lighting and help get you started. Read it if you want to know more about lighting setup for portrait photography.
Making the jump to studio portrait photography can be intimidating. In fact, many beginning photographers with natural light simply because the transition and portrait lighting setup seems too challenging. But making the leap is well worth it, allowing you to have complete command of exactly what parts of your subjects remain lit, and more importantly, where the shadows fall. This post will run through the basics of studio portrait lighting and hopefully set you well on your way to creating stellar studio portraits.
What Do You Need for Portrait Photography Lighting?
Lighting is the most important principle in photography, the foundation, so it is the responsibility of every photographer to learn all about it as early as possible. Do you want to add volume to your photos with the best portrait lighting? Do you need to shoot at night or in the evening and get quality pictures? In any case, you need not only a camera but also the best light for portraits.
How Does Portrait Lighting Work?
In classical portrait photography, there are several basic principles of lighting. How to get the right light portrait photography? You need to know and control them during the shooting process so that you know what light to use to create the right mood, the right image, or to present the model in the most advantageous way.
What are the types of lighting in portrait photography? You could say it's a play of light and shadow that photographers use to get great portraits. Simply put, the shape of the shadow on the face depends on the lighting mode. Let's take a look at the most common basics for lighting a person:
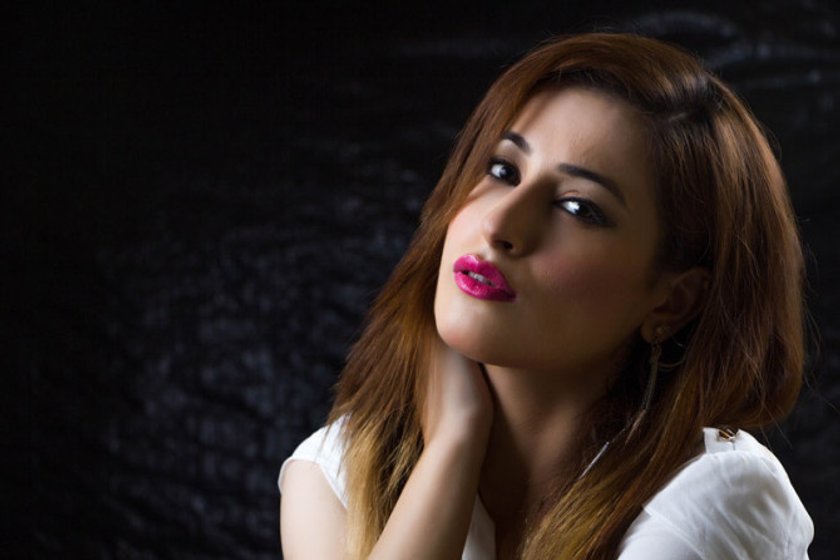
- Short lightning. For this range of lighting, the model should be positioned so that most of the face, even closest to the camera, is in shadow. This technique is most often used for low-key portraits. Faces become more sculpted, which adds volume to the image.
- The broad lighting is not a separate lighting scheme when you’re shooting, but rather a style. The broad lighting pattern is the way when the subject's face is slightly turned away from the center and the light falls on most of it. The shadow side of the subject’s face, respectively, will be smaller. This lighting is great when shooting portraits in a high key.
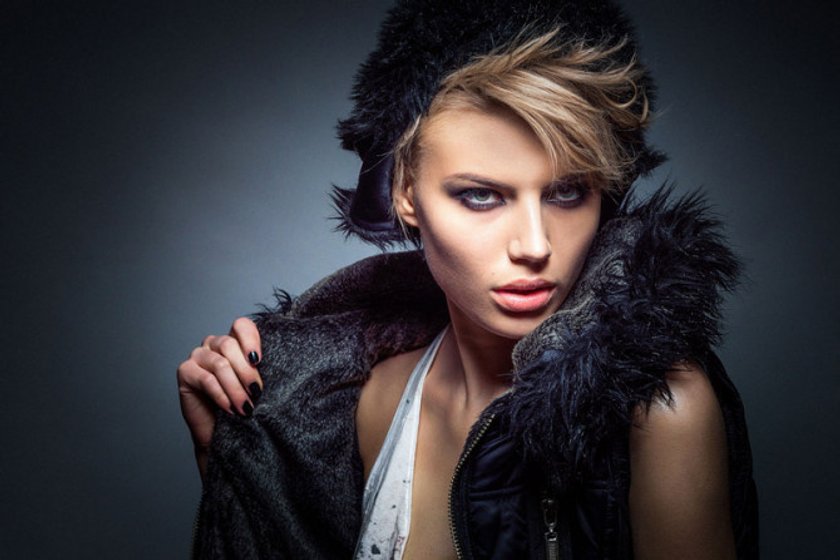
- Loop lighting. This is the one light that creates a slight shadow from the nose on the cheeks, with a light-shadow loop forming. To get this kind of light with a single light source, you need to place the illuminator slightly above eye level (not in front of the model), and at an angle of about 30-45 degrees away from the camera (it depends on the person, you have to learn to read people's faces).
- Rembrandt lighting. This lighting gets its name after the famous artist because Rembrandt often used these common lighting patterns in his paintings. Rembrandt's lighting is identified with a triangle of light on the cheek. Unlike loop lighting, where you should not touch the shadow on the cheek, in Rembrandt lighting, you should only get a small triangle of light in the middle of the cheek.
- Butterfly lighting. This position of the light resembles the shape of a butterfly because it creates a shadow under the nose that resembles wings. To get this nose shadow, the main light source is placed higher and directly behind the camera. The portrait lighting setup, like butterfly lighting, is created by having the light source behind the camera and just above the subject’s eyes.
- A split light is a perfect way to create an atmosphere of mystery. The staging is simple – you need to place the light on the side of the model so that one side of the face is in shadow.
Once you learn to recognize and reproduce each of the different portrait lighting setups, you'll understand how and when to use them. Also consider that without the catchlight, the model's eyes become dark and look unimpressive.
What Devices is Portrait Lighting On?
If we are talking about a studio, it should have both pulsed and constant light. This will give the best results and create an extraordinary light and shadow image.
If we are talking about a studio, it should have both pulsed and constant light. This will give the best results and create an extraordinary light and shadow image.
For a portrait light setup, it is better to avoid halogen and fluorescent lamps in front of your subject. Modern LED sources are relatively inexpensive, do not flicker, and come in a variety of shapes – from rings to huge LED panels and monoblocks. They work well with reflectors, softboxes, and other attachments.
The Studio
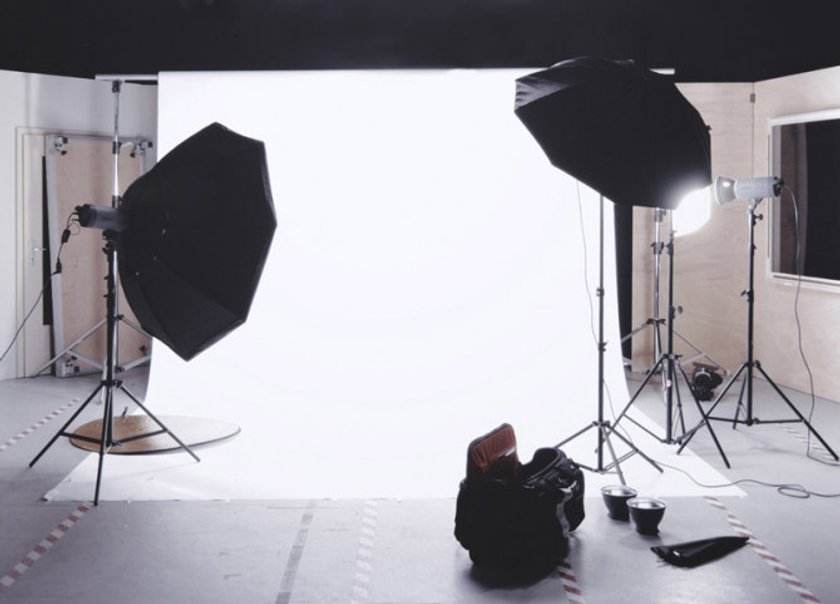
What about a portrait photography lighting setup? The first step to gaining complete control of your lighting is to start off in a blank space: a studio. The most basic studio is a simple room with no windows, white walls, and a roll of white paper as the background. This ensures that no outside light comes in and that no extraneous color leaks into the space. This way you can get a great studio light setup for a portrait. It doesn’t have to be a large room — you’ll need just enough space for some equipment, a model, and to be able to move around. A room of about 20’x15’ with ample ceiling space will do. Also correctly calculate the ratio between two lights in the space.
The Lighting
What do you need to build the best lighting for portrait photography? The lighting equipment you invest in doesn’t have to be fancy or expensive, and if you’re just starting out you can get by with just a single softbox and a 5-in-1 reflector. This will help you manage lighting setups for portraits. From there you can simply add on modifiers as you have the money or need. Still, it’s best to understand what each lighting element does before investing in it.
Here’s the simple breakdown:
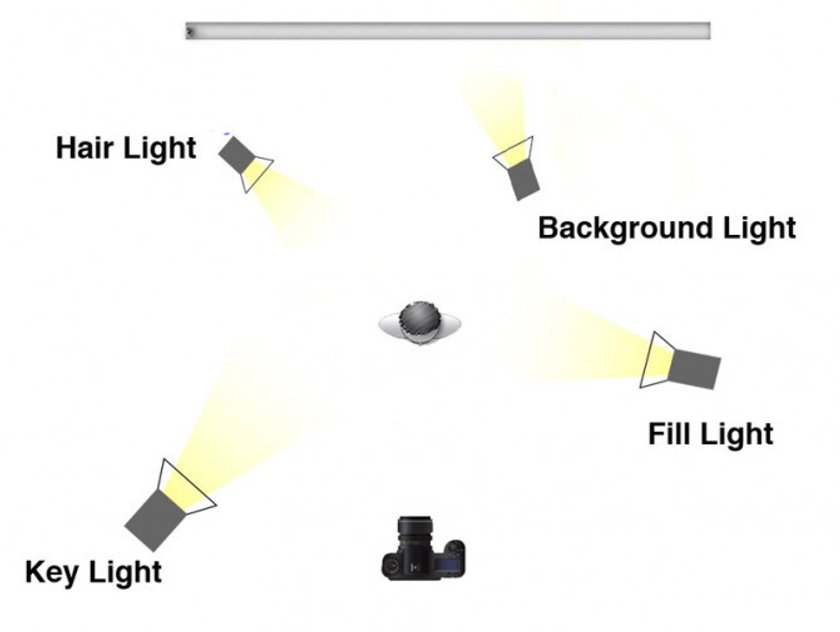
The Key Light
How to create the best light for portrait photography? The key light is your main light—the source of the greatest illumination. In classic studio portraiture, it functions as the “sun” and is generally placed over the head and at an angle to the subject (a 45-degree angle in classic glamour lighting).
Creating this light setup for portraits is not so difficult. In modern-day studio portraits, the key light is usually filtered through diffusion or bounced off an umbrella to create a softer light. A softbox or beauty dish will work fine here.
The Fill Light
Let's talk about another feature of studio lighting for portraits. The fill light exists to fill in the shadows created by the key light. This portrait lighting setup can be done with a reflector or white card or by a lighting instrument set to about ½ to 1/3 the illumination level of the Key Light.
It’s perfectly possible to get great studio portraits with just a key light and fill—in other words, a softbox and a reflector. (Click here for the Slanted Len’s quick tutorial on how how to set up for a one-light portrait.)
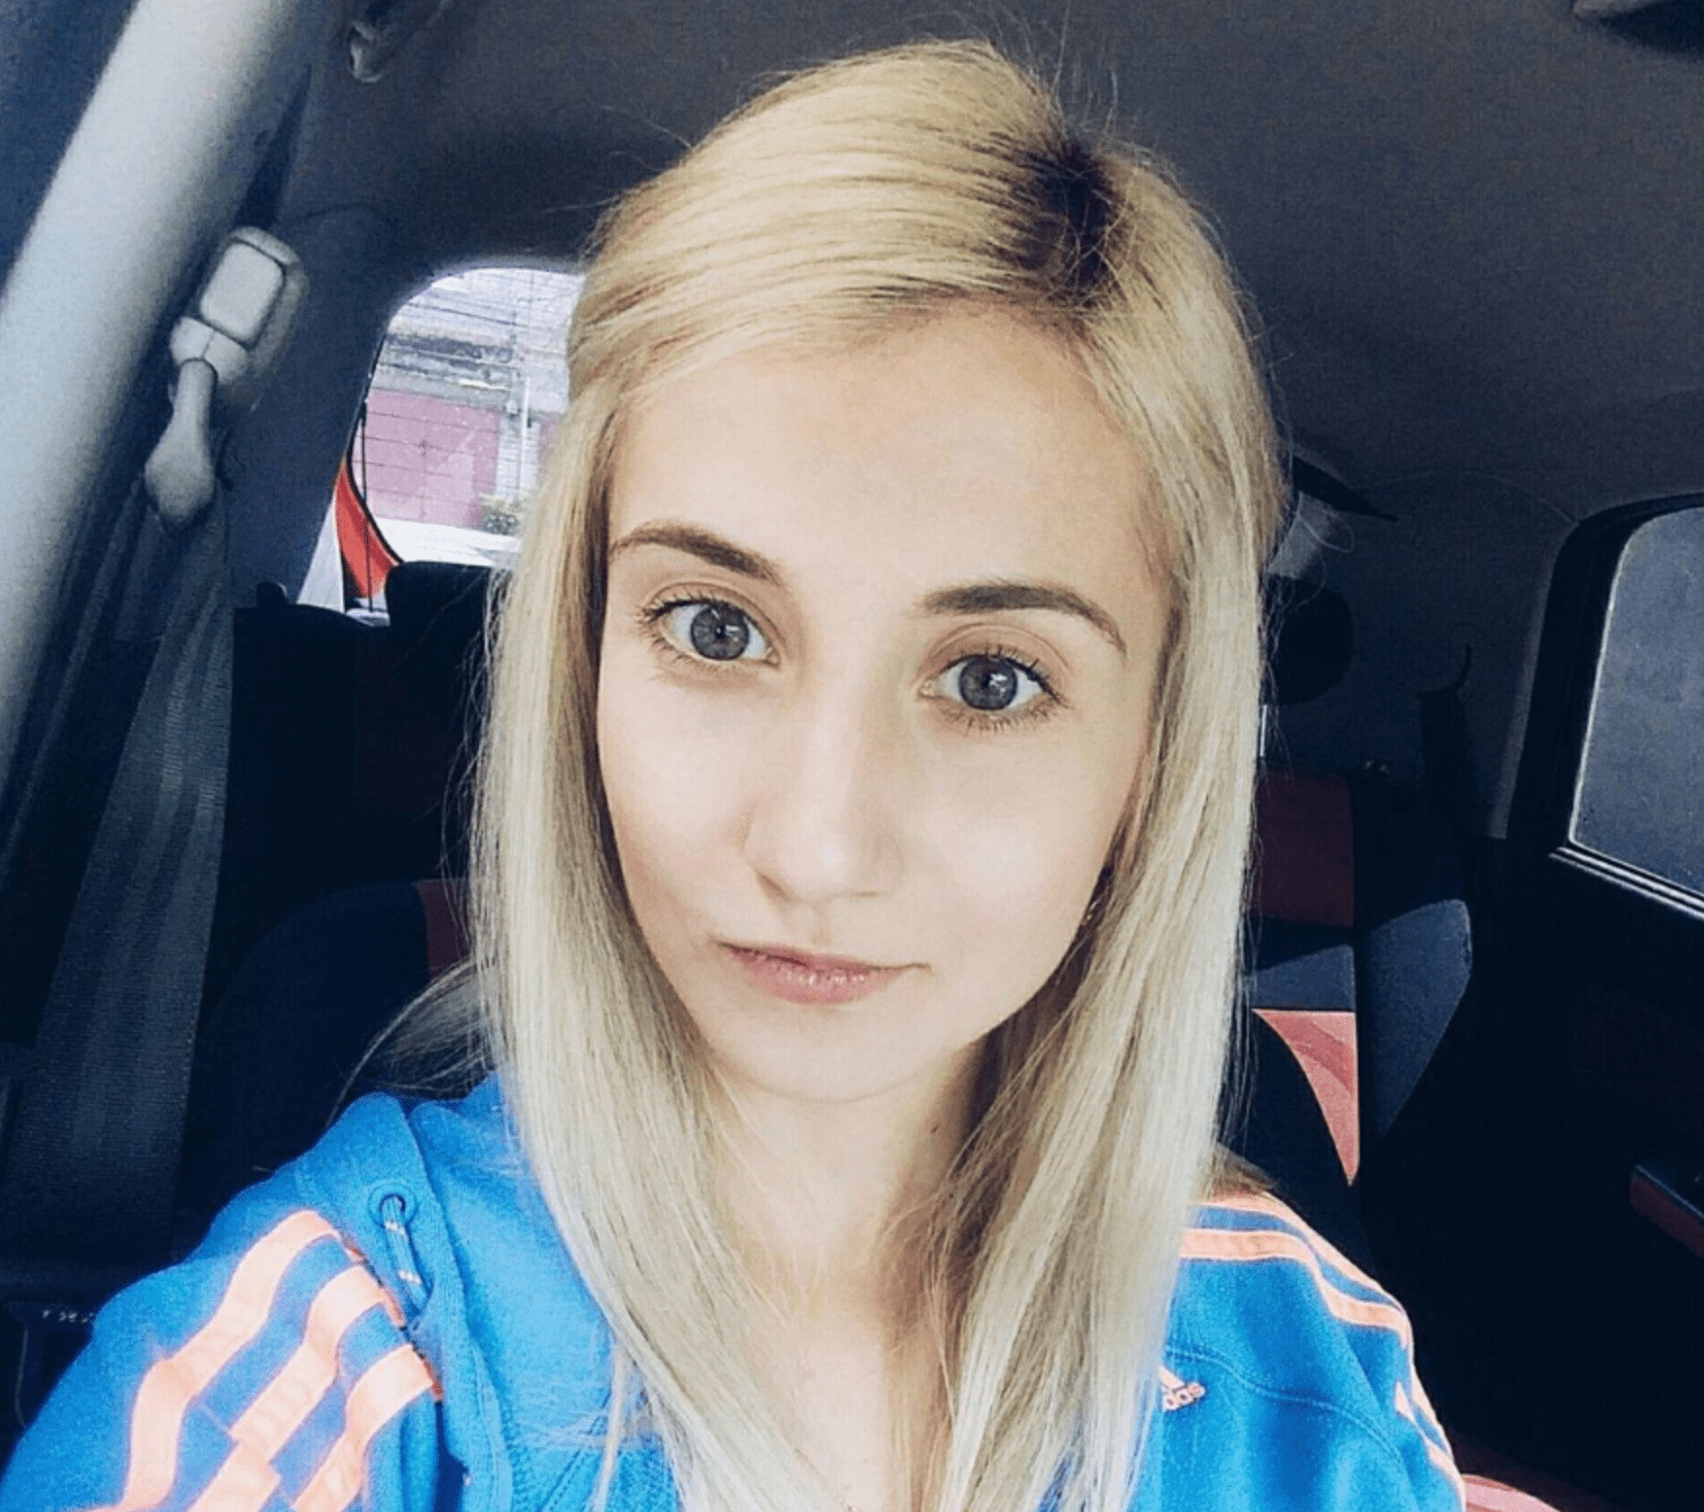
 Photo credit: Ryan Holloway
This portrait uses only a key light and reflected fill
The next two lights are used for setting the subject apart from the background. While not strictly necessary, they do add a level of three-dimensionality that many photographers prefer.
The Hair Light
As the name implies, this little instrument lights up the hair, creating a sort of backlight or side light that helps to define the subject. It’s useful to use a smaller instrument at low levels here and/or have a snoot or barn doors to sculpt the light exactly where you want it. It’s only intended as a highlight.
The Background Light
While not always necessary, the background light can make a huge difference if you want the background as part of the shot. It’s placed low and behind the subject so that it throws a semi-circular light on the background. Just keep in mind that if you’re going to light your background, you’ll want it to be relatively seamless and uniform in color so that it doesn’t distract from the subject.
The next decision to make is whether you want your lighting instruments to be continuous (i.e. floodlights or spotlights) or instantaneous (i.e. strobes or speedlights). Many beginners choose to start out with continuous light because what you see is what you get. With strobes, you’ll need to use the modeling light to see what it will look like before pressing the shutter.
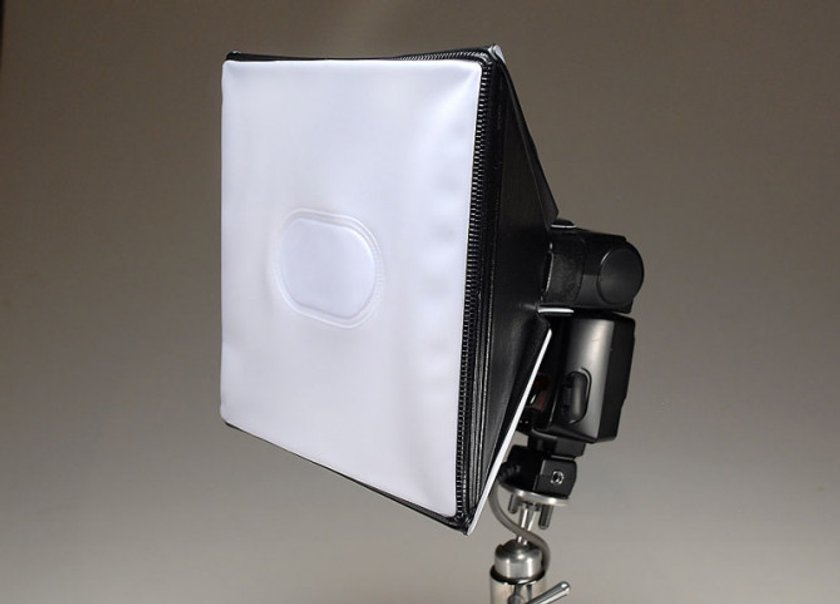 This inexpensive softbox is designed specifically for speedlights
Once you’ve found a space that will work as your studio and decided on what type of lights you want to use, you’re good to go. Now just find a model and click away.