See the results of our Landscape Image Makevover!
 Original Image by Lynne Sanderson
Recently we sent out a request for Landscape images for our Image Makeover challenge on our Aurora HDR Photography Facebook Group page. Thanks to everyone who participated!
I selected Lynne Sanderson’s image of a rail bridge in the South Island of New Zealand. She posted this image because it was one of her favorites, but there were some things she wanted to have changed. Here is what she hoped for:
1. The Foreground needs sharpening or cropping
2. The sign on the left railing needs to be removed
3. The sky and trees have potential
4. The shadow along the right needs to be dealt with
Now that we know what we want to do to this image, let’s jump right in!
Making Fixes to the Image
We can actually start off by taking care of two of Lynne’s requests at the same time.
1. The Foreground needs sharpening or cropping
2. The sign on the left railing needs to be removed
I chose Aurora’s cropping tool to align the rails so that they were centered (be sure to use the cropping overlays to help with this). I also removed most of the out-of-focus areas in the foreground of the image at the same time. I was able to crop out the sign on the left so it wasn’t a distraction anymore.
 Using the Crop tool to remove the sign and some foreground
3. The sky and trees have potential
Since the sky wasn’t very dramatic, I decided to add some moody clouds to the image. (If you are interested in learning how to do sky replacements, see my video click here.)
 Adding some clouds creates a more dramatic effect
4. The shadow along the right needs to be dealt with
Because the shadow was so dark, I decided to lighten the shadows and bring back some detail. First I added a new layer and in the HDR Basic section, I increased the sliders for the Shadows, Smart Tone and HDR Enhance filters. Next, I painted in the shadowed area (using a mask) for the new settings so that the entire image was not affected.
 Lightening the shadow and bringing out more detail
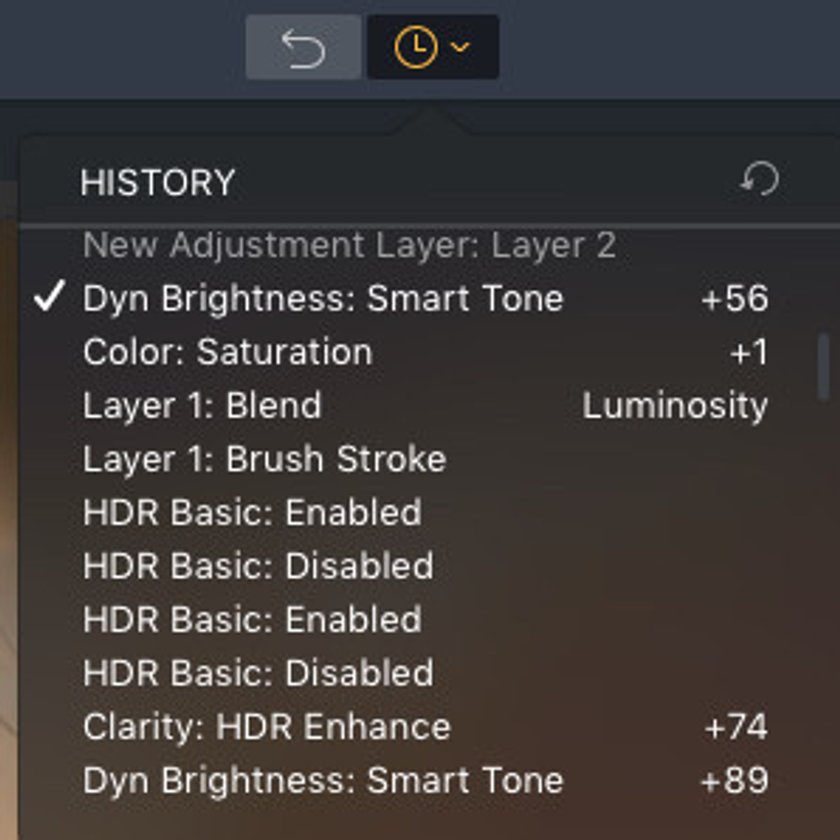
Using the History Button
The History Button allows you to see the progression of steps that you took in order to get to the final image. A great benefit to using the History Panel is that you can experiment with different filters because you can always go back to any step and start over. You can even scroll to the bottom to revert back to the original or select the reset button (circular arrow to the right of the History text).

Making More Adjustments
Here are a few experimental looks that I came up with using different filters in Aurora. By using the History Panel, I could easily try out new settings. If I found I didn't like the results, I just jumped back in time with the History Panel.
 The Color Toning filter adds Hues to the highlights and shadows
 Adding the Image Radiance and Vignette filter gives it a soft, mysterious look
Using History to change your mind
Let’s suppose you actually prefer the results of this image before you started adding extra filters to it. You can easily go back any previous step and make new changes if you wanted to, or stop and export the image at any point.
You can also save your file with your History as well. (As of the time this article was written, this feature is available on the Mac. The PC will have this feature in mid 2018)
To do this, go to File > Save... This will save your image as a native Luminar file (file extension .lmnr). Then select the Save to History Document option. The next time you open your Luminar file, you will see all the steps in under the History panel.
Note: Even if you don’t save the History with a document, by saving a native Aurora HDR file you preserve edibility. Each filter, adjustment layer, and texture can be adjusted in the future.
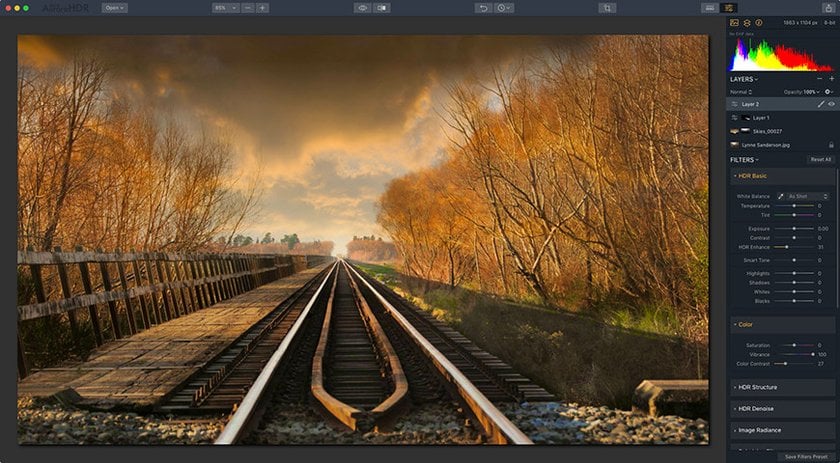
For the final image, I decided to intensify the colors a bit more by increasing the Vibrance in the Color section. By using the HDR Enhance slider in the HDR Basic section, I was able to increase the contrast and definition of the trees and railroad tracks.
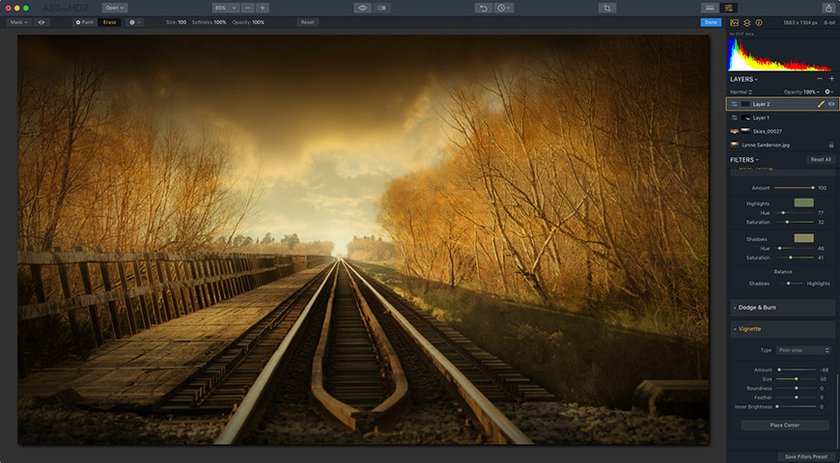
 Going back to make a few final adjustments
In Conclusion
Thank you Lynne for letting us use your landscape image! We began by cropping the image to get rid of any unwanted objects and then added filters to bring out the color and details in the image. We also used the History Panel to go back to one of our previous steps and made some final adjustments. Seeing all of the steps gives you creative freedom to try different effects at different point along the way.
We hope you enjoyed this Image Makeover Challenge. We would love to see your before and after Landscape images using Luminar 2018 on our Aurora HDR Photography Facebook Group!
 The Final Result