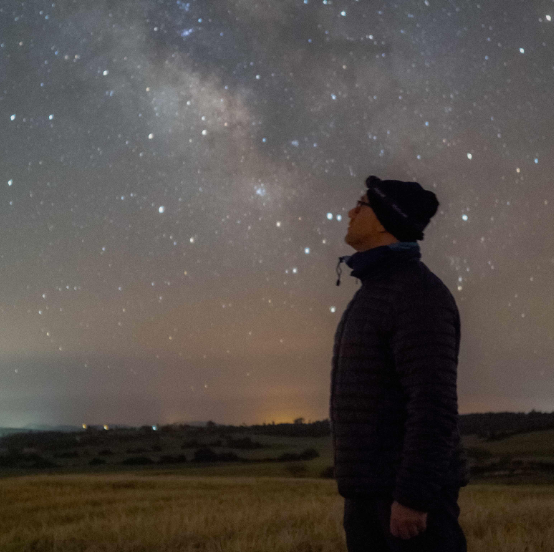

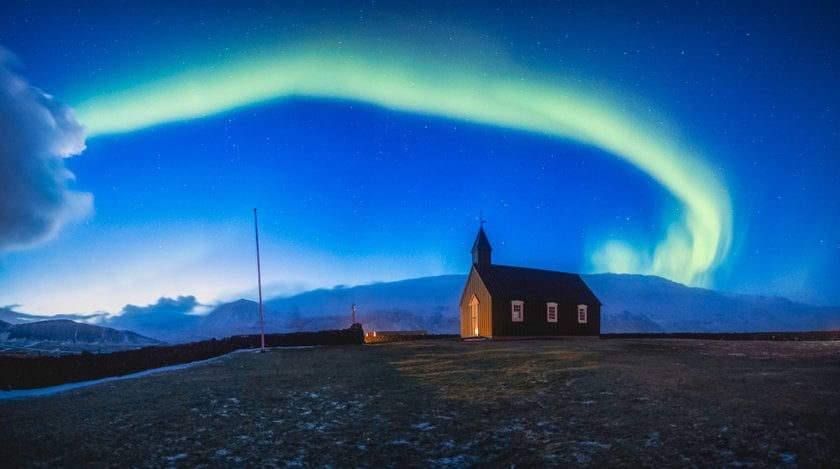
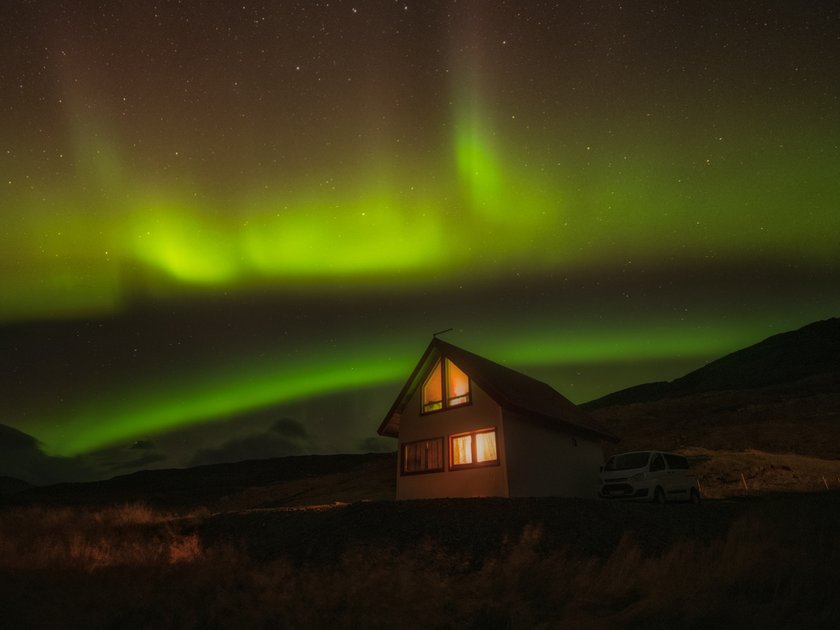
The Northern Lights, or Aurora Borealis, is a stunning natural phenomenon that has fascinated photographers and travelers for generations.
This light show, caused by the interaction of charged particles with the Earth's atmosphere, paints the night sky with color, making it a prime subject for photographers. In this guide, we will explain how to photograph the Northern Lights, equipping you with the knowledge and techniques necessary to capture this mesmerizing spectacle.
What are the Northern Lights
The Northern Lights, the Aurora Borealis, result from the interaction between the solar wind and the Earth's magnetic field. These charged particles create fascinating lights in the polar regions, mainly in the Northern Hemisphere.
The intensity of auroras is usually measured on a scale known as the "KP scale." The KP is a way of quantifying geomagnetic activity from 0 to 9, with each number representing a specific level of magnetic activity. This scale reports the probability and intensity of northern and southern lights at different locations worldwide. Depending on the scale, auroras may emit characteristic colors.
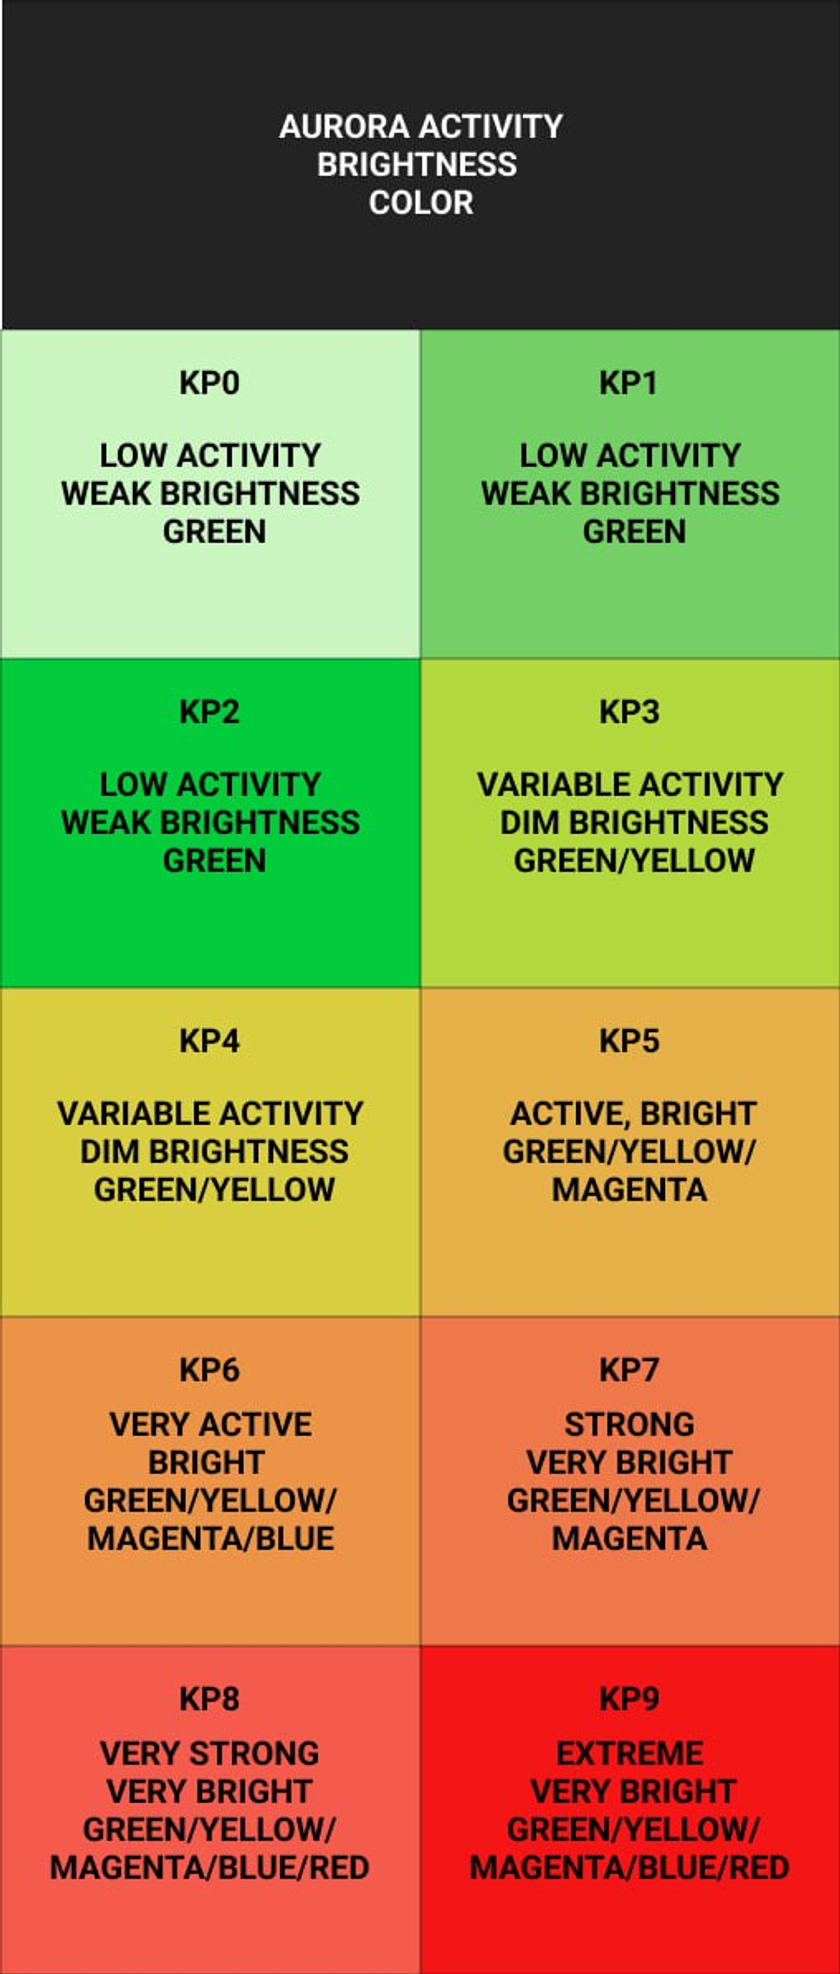 According to the Intensity Levels on the KP Scale

- Kp-0 to Kp-2: At these levels of geomagnetic activity, auroras are usually faint and tend to emit pale greenish colors. These lights can be difficult to distinguish with the naked eye, and are often best seen through sensitive cameras.
- Kp-3 to Kp-4: With moderate geomagnetic activity, auroras tend to show more intense green colors. Green is the most common color of auroras due to the excitation of oxygen atoms at intermediate altitudes.
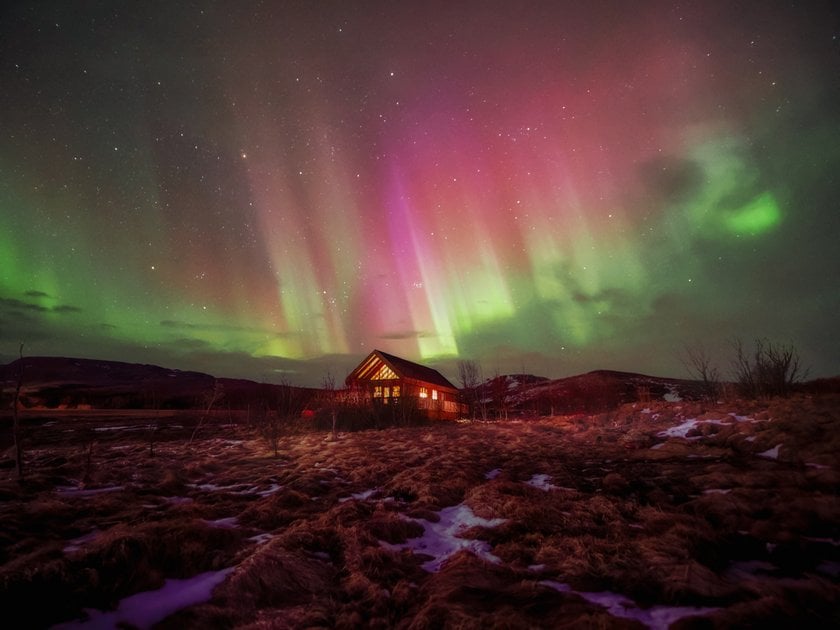
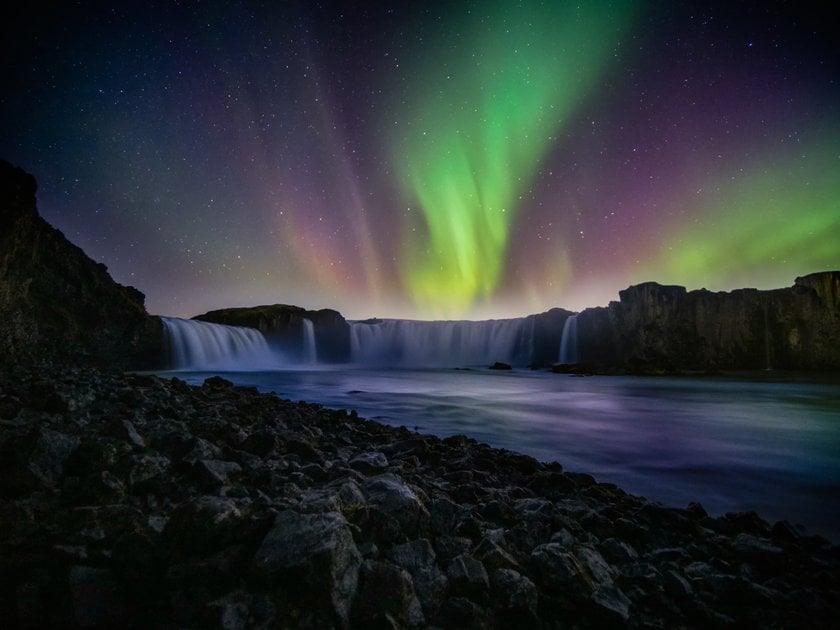
- Kp-5 to Kp-6: When geomagnetic activity is high, the colors of the auroras become more vibrant and varied. In addition to green, caused by oxygen at about 100 km altitude, colors such as pink and purple may appear. These latter colors result from a combination of red and green emissions—red from high-altitude oxygen (above 150 km) and blue/green from nitrogen. This mix of interactions at different altitudes gives auroras their remarkable range of colors at these activity levels.
- Kp-7 to Kp-8: At very high levels of geomagnetic activity, auroras can display a full range of colors, including greens, pinks, purples, reds, and occasionally blues. The combination of these colors creates a truly breathtaking spectacle.
- Kp-9: During an intense geomagnetic storm, auroras can be exceptionally bright and have unusual colors, such as deep blue and violet. Reds and greens are also common at this level.
It is important to note that aurora color perception can also be influenced by location, altitude, and the quality of the night sky. In addition, long-exposure photography can capture more vibrant colors than those seen with the naked eye. Therefore, a higher Kp-Index is not only associated with greater color intensity but also with a greater likelihood of seeing various colors in auroras.
Why Photograph the Northern Lights
 Photographing the Northern Lights is not only an opportunity to capture a natural wonder but also a personal and artistic journey. The stunning images you create can inspire others and serve as a testament to the incredible beauty of the Earth.
Equipment required for photography of the Northern Lights
Below, we will not only talk about essential photographic equipment but also about important details, time of the year, and best locations.
Planning your Northern Lights Photography Trip
Choosing the right place and the right time is critical. Location, seasonal variations, and weather forecasts are also important to maximize your chances of seeing and photographing the Northern Lights.
The Best Months to See the Auroras
- Autumn (September to November): Autumn is one of the best times to see auroras in many regions of the Northern Hemisphere. As nights lengthen and temperatures drop, conditions are ideal for aurora viewing.
- Winter (December to February): During the winter months, the nights are longer and the sky is darker, making it a prime season for aurora hunting. In these seasons, the Northern Lights are particularly spectacular.
- Spring (March to May): As spring arrives in the Northern Hemisphere, it is still possible to see auroras before the summer solstice ushers in the shorter nights.
- Summer (June to August): In summer, nights are shorter in the Northern Hemisphere, which reduces the opportunities for aurora viewing. However, in extreme latitudes, such as northern Norway, Sweden and Finland, it is possible to see auroras even in summer.
Some of the Best Places to See the Auroras
1. Scandinavia (Norway, Sweden, Finland): The Scandinavian countries, particularly Norway, Sweden, and Finland, are renowned destinations for viewing the Northern Lights. The Arctic Circle regions offer exceptional opportunities to observe this natural phenomenon.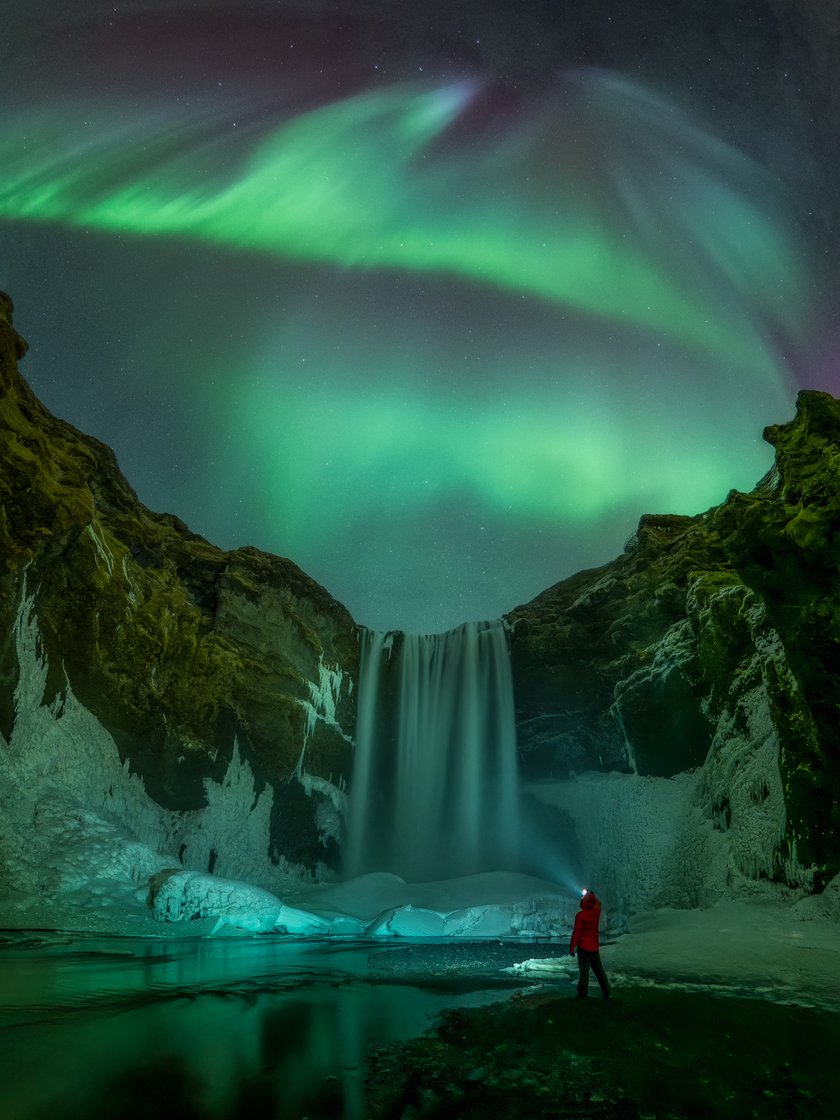 2. Iceland: Iceland is another outstanding place to witness the northern lights. Its geographical location and vast natural landscapes make it a popular destination for aurora photography enthusiasts.
3. Canada (Northwest Territories, Yukon): In Canada, northern regions such as the Northwest Territories and the Yukon offer scenic views and dark skies ideal for aurora viewing.
4. Alaska (USA): Alaska is one of the northernmost U.S. states and offers numerous remote locations for aurora viewing, especially on cold winter nights.
5. Antarctica: For those searching for the southern lights, Antarctica is the place to be. Adventurers who travel to the Antarctic continent can be rewarded with spectacular views of the southern lights.
Equipment Required
 Photographing northern or southern lights is an exciting and magical experience, but it requires specific photographic equipment to capture this natural phenomenon properly. Here is a list of essential equipment needed for aurora photography:
- DSLR or Mirrorless camera: For optimal results, use a DSLR or Mirrorless camera. These types of cameras allow you more control over exposure and manual settings.
- Wide aperture lenses: Use lenses with wide apertures (f/2.8 or wider) to allow more light into the camera. Wide-angle lenses, such as 24mm or wider, are ideal for capturing auroras along with the landscape.
- Sturdy tripod: A sturdy tripod is essential for keeping your camera steady during long exposures. Ensure it is sturdy enough to withstand adverse weather conditions and prevent wind vibration.
- Remote control or self-timer shutter release: A remote control or self-timer shutter release is useful to prevent camera shake when the shutter button is pressed, ensuring sharp images.
- Extra batteries: Cold temperatures can quickly drain a camera battery. Carry extra batteries and keep them warm in your pockets when not in use.
- Headlamp or red LED headlamp: A dim light source, such as a headlamp or LED headlamp with red light, is useful for adjusting camera settings and moving in the dark without disturbing your night vision. It can be useful for illuminating the scene in very low light conditions.
- Heatable tape: Helps prevent the lens from fogging due to temperature changes.
Rugged, insulated backpack or bag: Keeping your camera gear and batteries warm and dry is essential in cold weather. An insulated backpack or bag can help you achieve this.
Camera Configuration
Setting up your camera correctly is critical to capturing stunning photographs of the northern or southern lights. Here are some essential parameters to consider when setting up your camera:
- ISO: Use a high ISO value (generally between 3200 and 6400). As auroral activity increases, you can lower the ISO. Experiment with different ISO values to find the right balance between exposure and noise.
- Aperture (f/stop): Select a wide aperture (a lower f/-number, such as f/2.8 or lower) to allow more light to enter the sensor.
- Shutter speed: Because auroras are a moving phenomenon, use a relatively fast shutter speed of about 1 to 20 seconds to avoid blurring. However, adjust this setting according to the intensity and speed of the auroras. Experiment with different exposure times.
- Focus: Focus manually on infinity (the ∞ mark on the lens) or a bright star in the sky. Check that the focus is correct
- File format: Capture your images in RAW format instead of JPEG. RAW files retain more information and give you more flexibility in further editing.
- White balance: Use 3500K manual white balance, which approximates the natural color of the aurora.
- Image stabilization: Turn off stabilization if your lens and camera allow it. In tripod situations, image stabilization can be counterproductive.
- Noise reduction: Disables long exposure noise reduction in the camera. You can manage noise in post-production images with Luminar Neo. This allows you to avoid waiting for the camera to perform the process.
As you observe and photograph auroras, adjust these settings according to changing conditions and the specific characteristics of the aurora you capture. Practice and experimentation are key to spectacular results in aurora photography.
Post-Processing with Luminar Neo
The processing of our photos is a fundamental part of this type of image. Luminar Neo allows us to improve and enhance northern lights photos effectively. Here is a basic guide on how you can use Luminar Neo to process your aurora images:
1. Image Import
Open Luminar Neo and select the Aurora images you want to process.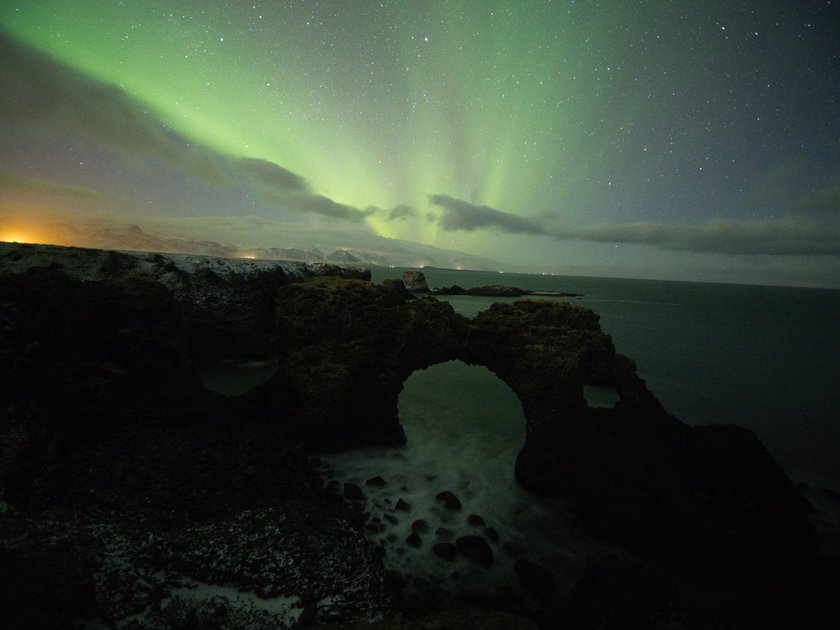
2. First Adjustments
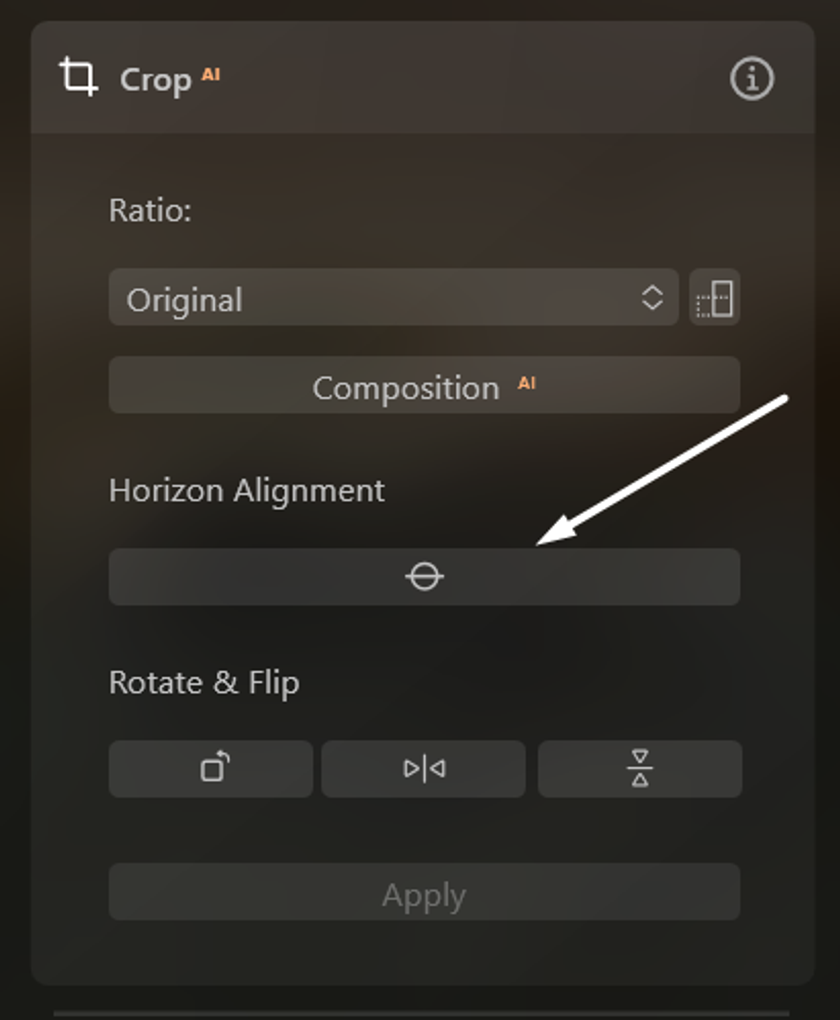
We use the crop tool to correct our photograph to the level. Click on Horizon Alignment. It will automatically analyze the photo to make it level.
3. Basic Development
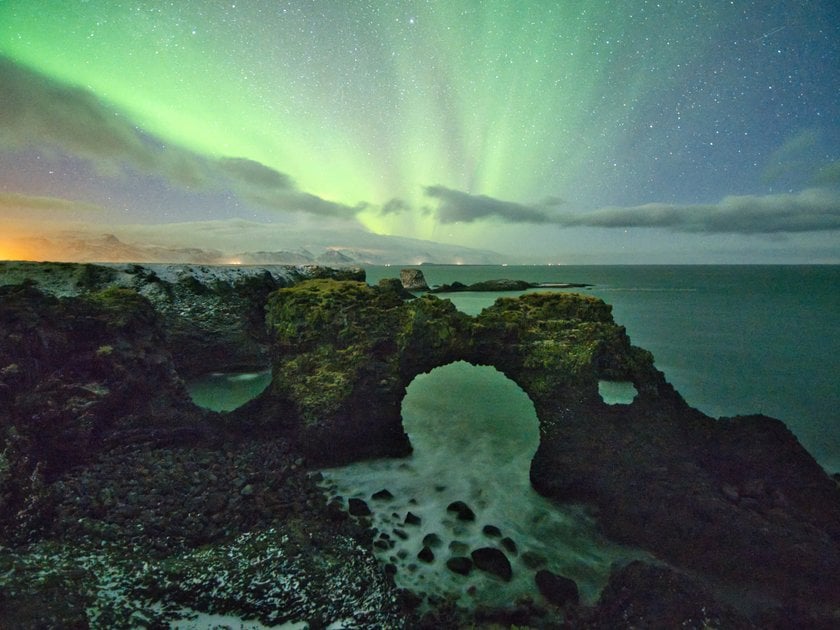
We will perform the basic development of our photograph. Being a night photo in an area with almost no light pollution, we had to use high ISO parameters (12800), which implies applying a noise reduction later on.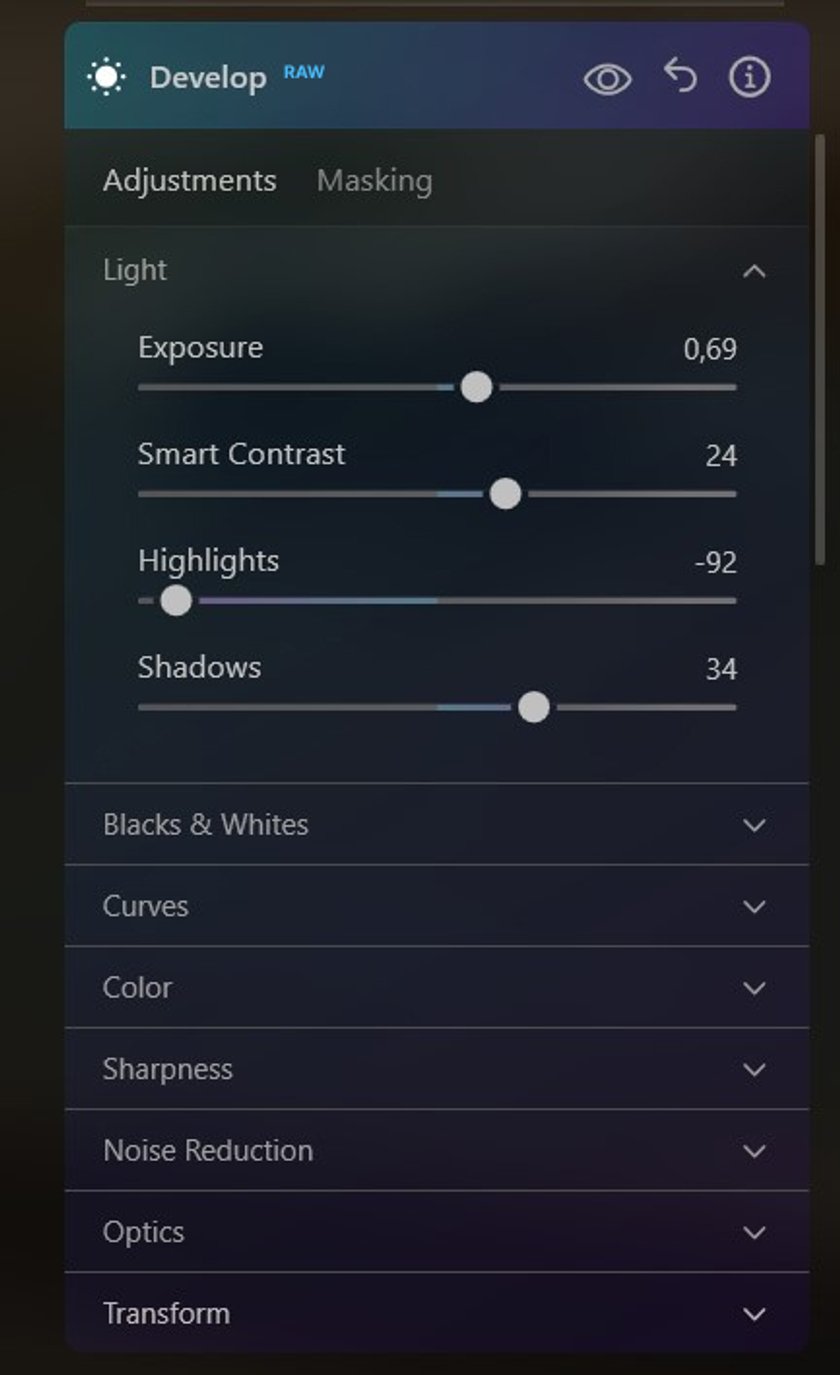
- Adjust exposure, contrast, highlights, and shadows in the Light Panel.
- Correct the white balance and color panel to leave the whole scene to our liking.
- Apply saturation and intensity to reveal the scene's colors.
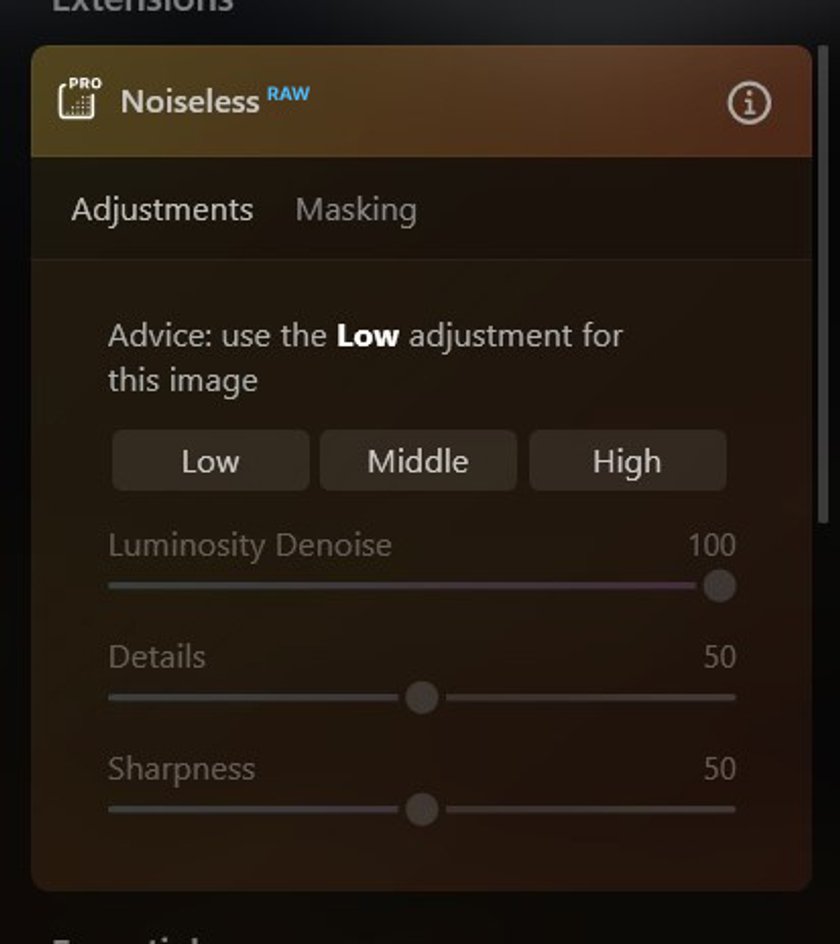
4. Noise control
Luminar Neo offers AI noise reduction tools, which allow us to control noise in photos like these. This tool analyzes our image and applies noise reduction at three different levels. For this shot, I have chosen the Medium level.
5. Creative effects
Luminar Neo offers a wide variety of creative effects that you can apply to your aurora photos to create a unique style. I like to recreate the atmosphere I had when capturing this stunning photo with different effects. In this case, I have chosen Glow and Mystic.
6. The Final Showcase
We've enhanced the Northern Lights at Gatklettur, highlighting their ethereal beauty. Now, let's see how these changes have improved the original scene.

Summary
The Northern Lights, or Aurora Borealis, as you have seen, are a wonderful natural phenomenon, you have seen how this phenomenon happens and the different levels that exist. I have shown you how to plan and photograph them effectively. The best places and times, and finally, image post-processing using Luminar Neo. All together will allow you to take the photographs you have always dreamed of capturing of the northern lights.