
Explore the magic of night photography with this guide! Learn to master low-light conditions, capture stunning cityscapes, and enhance your skills with practical tips and projects for all levels.
Night photography opens up a whole new realm of creative possibilities, moods, and atmospheres for photographers. As the sun sets, you can venture out with your camera to capture cityscapes, street scenes or even the cosmos. The night presents a whole new approach to the kind of photography you would do during the day, especially for portraits and street scenes.
Whilst night photography can be challenging, it is also incredibly rewarding, rapidly advancing your skills as you become more accustomed to adjusting your settings in low light conditions. You’ll find the process of experimenting at night both fun and enlightening, as you witness your results improve steadily. In this article, we’ve outlined various ways to get started with night photography with suggested projects that suit different skill levels.
Ideas for Beginners
Venturing into night photography can be daunting due to the challenging low-light conditions which can result in grainy images. However, by setting realistic goals and starting with fun and educational exercises, you will begin to see great results. Engage in activities that teach you about crucial settings like aperture, shutter speed, and ISO, enhancing your understanding of nighttime photography.
For all beginner activities, a tripod is essential. Using a tripod allows you to experiment with longer shutter speeds, allowing more light into your camera. This not only ensures sharp, steady shots but frees you to focus more on capturing brilliant images.
Cityscapes and Light Trails
Find a great vantage point in your city and set up with your camera and tripod. Shooting a stationary subject such as a city will allow you to run through various settings to understand how to get a crisp image. This contrasts with the dynamic subjects found in street photography, providing a more controlled learning environment.
As you become more comfortable with your camera settings, experiment with longer shutter speeds to capture light trails created by moving traffic. The streaming lights of cars will create visually stunning patterns helping to deliver amazing results. Experiment with different shutter speeds and light sources, it can go from cars to planes—anything that moves through your frame can contribute to a stunning long exposure shot. 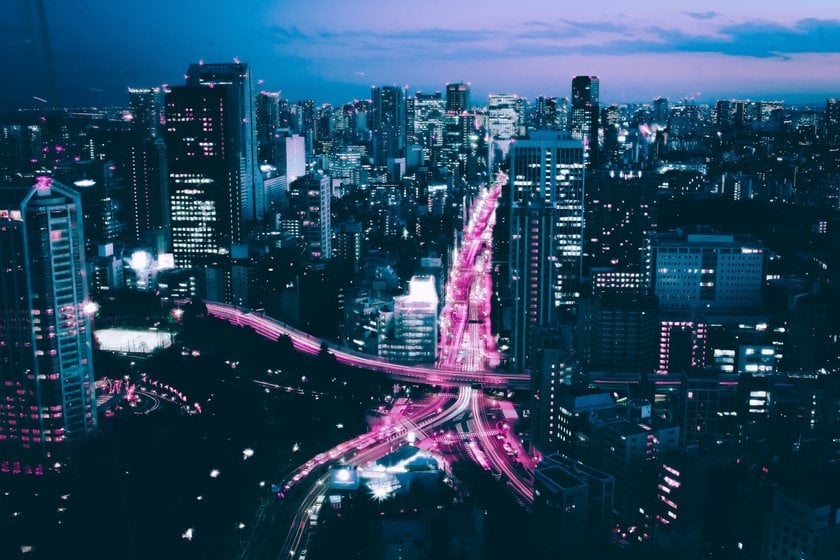
Light Painting
Once you’ve understood the basics with long shutter speed times, you can create artistic pieces with light painting. Use the flashlight on your phone or colourful portable lights to make your designs in the air. With your camera set on a tripod, set the self-timer, and once you hear the shutter open start your drawing. This is a great way to learn more about your camera and at the same time have a great deal of fun. 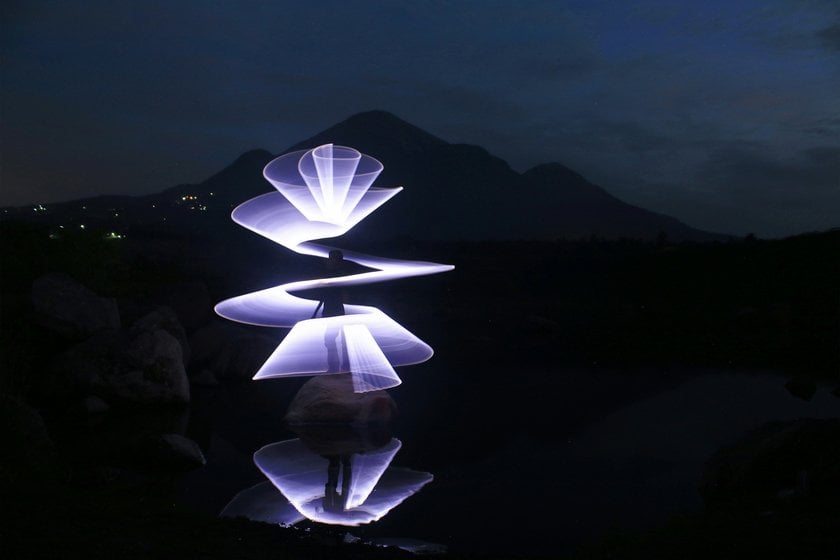
Advanced yet easy-to-use photo editor
Get Luminar Neo Now
Moon Photography
Photographing the moon presents a unique challenge, but if you’re ready to test your skills, give it a go. Unlike the previous two beginner projects, a long shutter speed will not help us in this scenario as it would result in a blurred moon. Instead, this is an opportunity to learn more about balancing aperture and ISO settings to capture the moon sharply and clearly without overexposure. This will require you to apply everything you’ve learned so far. The effort, however, is well worth it, leaving you with stunning images and one step closer to mastering the art of night photography.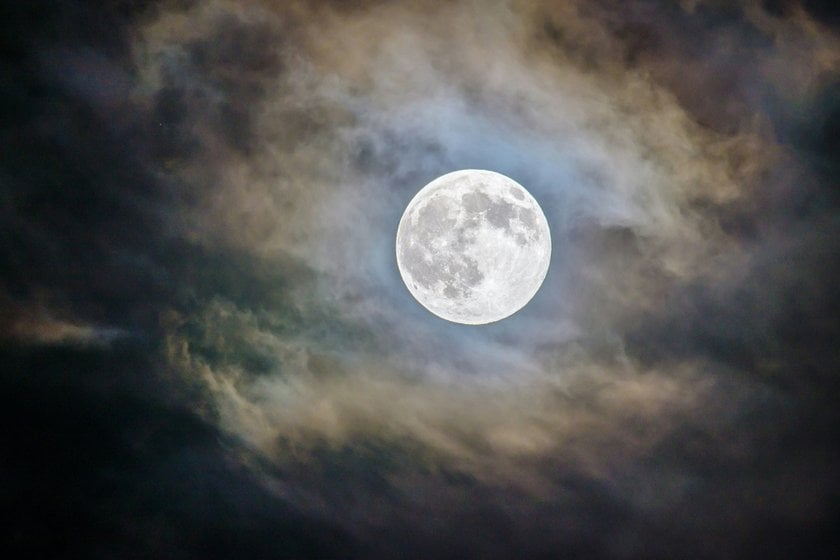
Ideas for Intermediate Photographers
As you progress to an intermediate level, your confidence in camera settings and post-processing skills for night photography should be growing stronger. A vital lesson at this stage is the importance of continually adjusting your settings as you move between different scenes at night. Lighting conditions can vary significantly, and mastering the ability to swiftly adapt your exposure is crucial. This section will guide you through more complex techniques and settings that build on your foundational knowledge, pushing your night photography skills further.
Street Photography
This is where the difficulty begins to increase. Street photography is dynamic and fast-paced and using a tripod isn’t advisable—it’s too cumbersome and the set-up time will leave you lagging behind. With moving subjects, you need to maintain a fairly quick shutter speed. This is where you will rely on aperture and ISO to ensure enough exposure for your compositions. Keep an eye out for interesting scenes and start clicking away. As your skills increase you will begin to see clearer subjects and scenes. 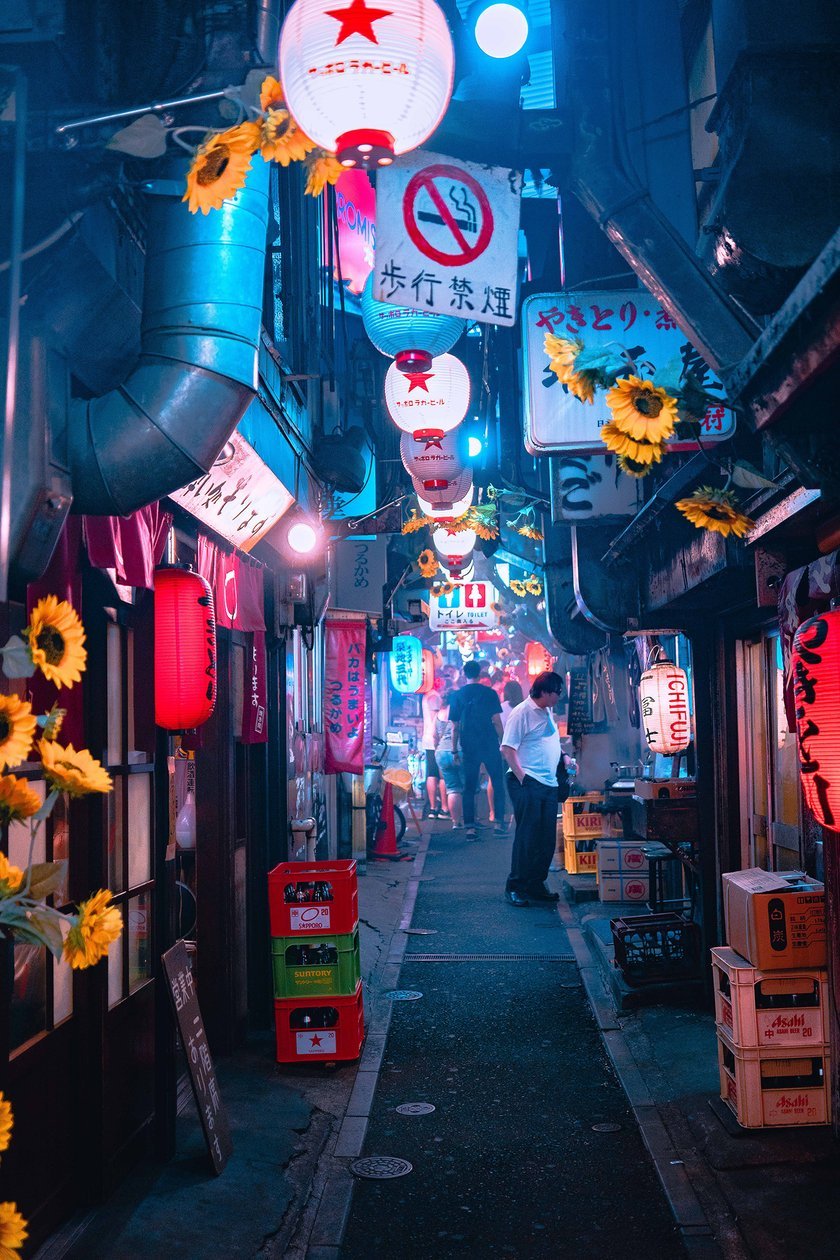
Portraits
At this stage, you can begin to experiment with portraiture. The fun part about night portraits is that you can experiment with a combination of light sources and colours to create fun and engaging scenes. It takes a clear understanding of your settings to get crisp shots, where your model looks well-lit without your light sources looking overexposed. A good understanding of light will result in better portraits, as more controlled light leads to more professional-looking results.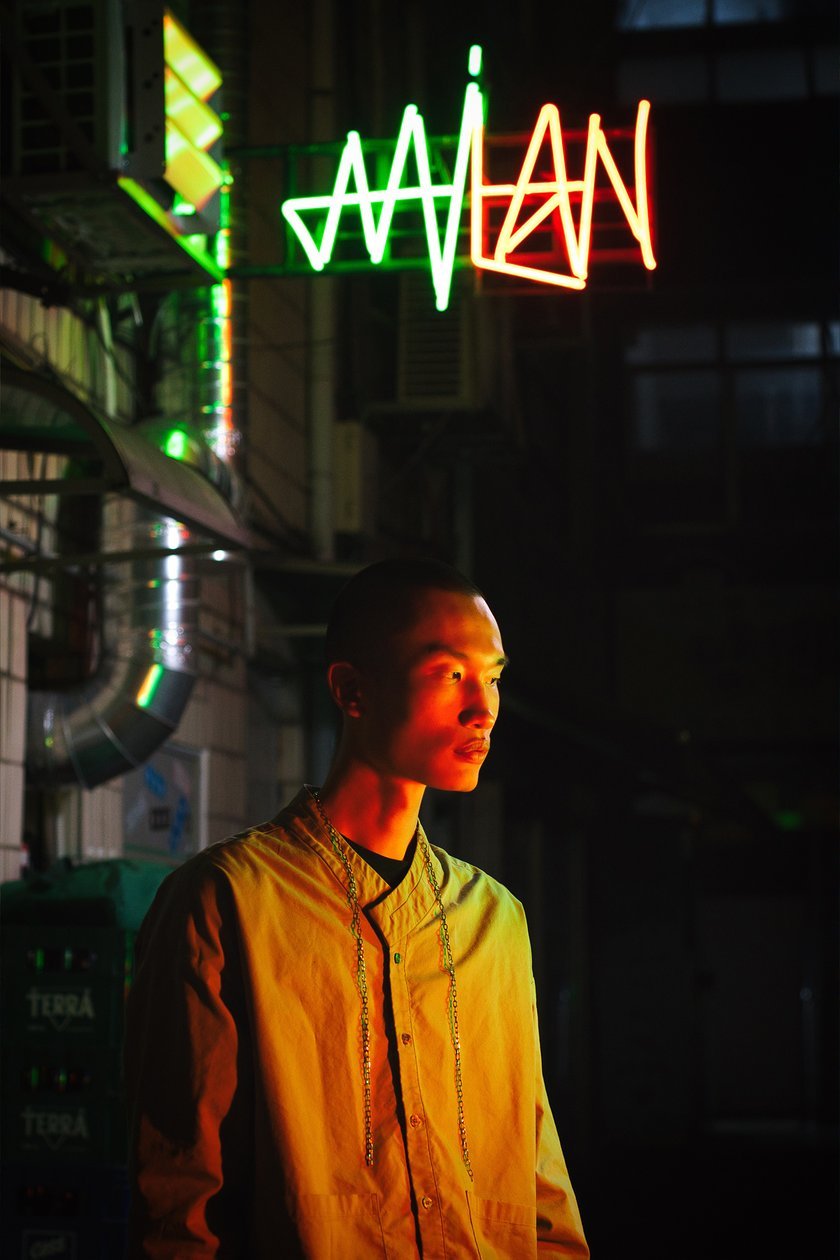
Exclusive Tools of Endless Possibilities in One AI Editor
EXPLORE NOW!Star Trails
Astrophotography can get extremely complex. However, capturing stars streaking across the sky is a great way to start tackling the more challenging aspects. Setting your camera on a sturdy tripod, you will need to set your shutter speed to a long exposure time, from several minutes or even hours. This setup not only records the stars but can also bring out details in the landscape below. To minimise light pollution, choose a location far from city lights. A wide-angle lens is ideal to encompass as much of the sky as possible. 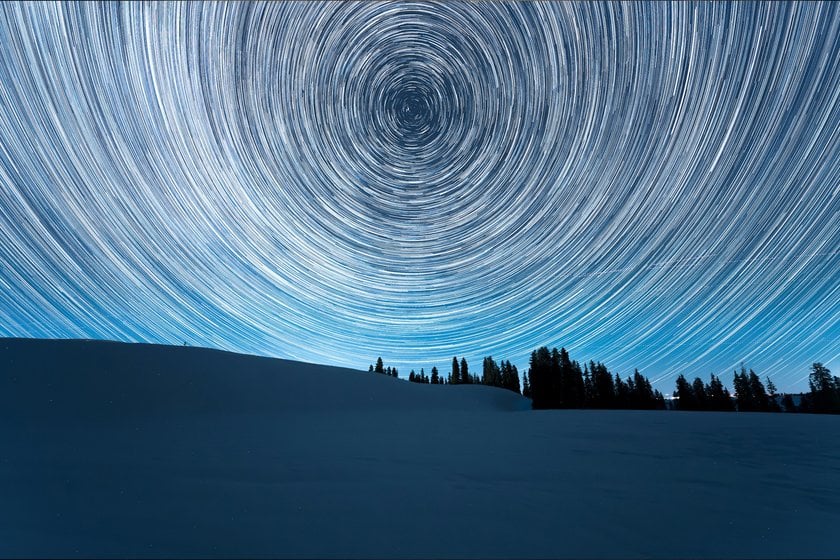
Ideas for Advanced Photographers
At this advanced stage, you find yourself effortlessly adapting to varying scenes, with the adjustment of your camera settings becoming second nature. Your photographs now showcase a professional quality, with sharp details and minimal noise. So, read on for more challenging projects. 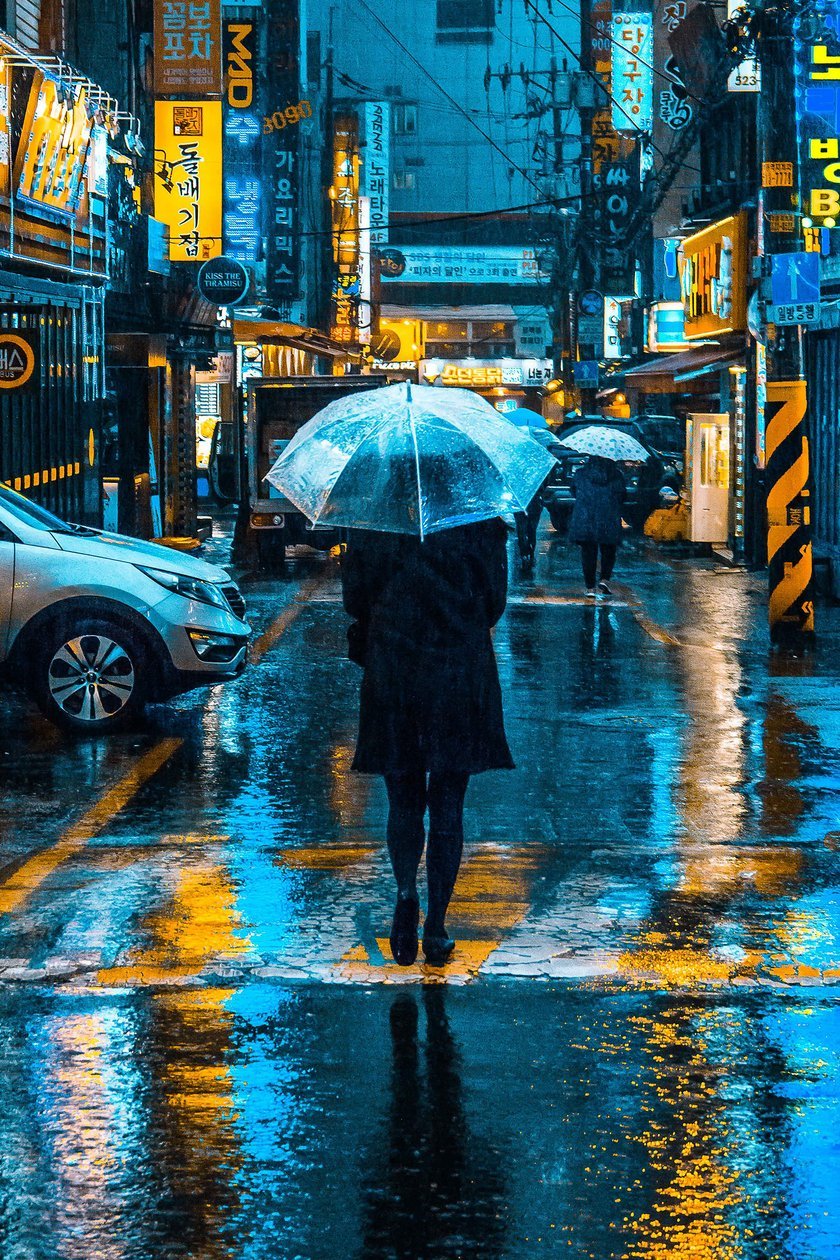
Neon & Cyberpunk Street Scenes
This genre demands the ability to capture the vibrant energy of dynamic subjects with a vibrant neon backdrop. The trick here is achieving the right balance between the correct exposure of neon highlights and clearly defined subjects. A deep understanding of camera settings, lighting dynamics, and post-processing techniques is essential to produce crisp, vivid images.
Panning Shots
Panning is a technique that adds motion to your still images by moving the camera along with the moving subject, such as a speeding car. Matching the speed of your panning motion with your shutter speed is crucial to keeping your subject sharp against a blurred background. This technique requires patience and practice to perfect but results in energetic images.
Astrophotography
Astrophotography is a deep dive into the technical and equipment-intensive world of photography, often requiring specialised gear like dedicated astro cameras, telescopes, and tracking mounts to capture stunning details of celestial bodies. However, that doesn’t mean you can’t start with the minimum tools. This guide here should help you if you want to learn more. Astrophotography is a rewarding challenge that will develop an even stronger understanding of your camera and deepen your appreciation of the cosmos, making it a profoundly fulfilling pursuit. 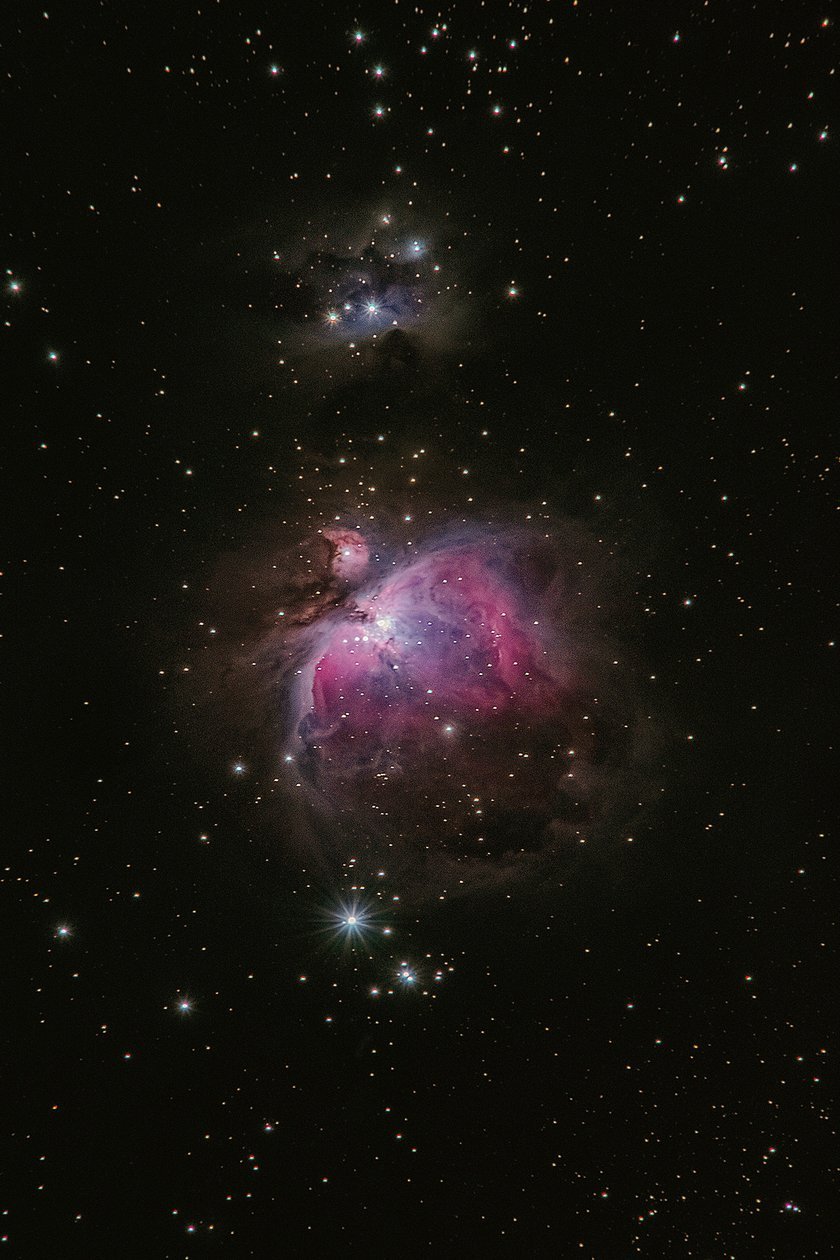
Tips for All Skill Levels
1. Stabilize Your Shots
A tripod is essential for many genres of night photography, especially those requiring long exposures. For capturing moving subjects without a tripod, a helpful technique is to use your camera strap for stabilisation. Extend your camera away from your body until the strap is taut. This method provides more stability than handheld shooting and can significantly reduce camera shake.
2. Optimize Camera Settings
Night photography settings can vary widely due to the changing conditions of low-light environments, but one key principle applies: always shoot for the highlights. Ensuring your highlights are well-exposed allows you to preserve detail in the brightest parts of your image.
Whilst there are no universal settings that guarantee perfect results, shooting in RAW is highly recommended. RAW files capture a broader dynamic range, from shadows to highlights, giving you more flexibility in post-processing. This is crucial because retrieving details from shadows is generally easier than recovering overexposed highlights, making it important to get your highlights right in the camera.
4. Refine Your Night Photos
Editing should be an enjoyable experience and to your own taste. Since editing styles are subjective, one useful approach is to study the work of other photographers whose style you admire and try to emulate their techniques. Experiment with different editing tools to achieve either moody or vibrant atmospheres, depending on your personal preference. The key is to find what works best for you and continually evolve your style.
Conclusion
Night photography is not straightforward. It requires a lot of experimenting and patience, but the results are well worth the effort. This genre offers tremendous potential, from creating moody street scenes to taking a glimpse into our galaxy.
As you refine your skills, you'll discover the thrill of exploring various night photography genres, each bringing its own unique satisfaction as you see your work improve in clarity and detail. Remember to be patient but also to enjoy the process. So embrace the night and venture out with your camera in hand, ready for your next photography adventure.