Have you ever taken a photo and thought, "Why is it so blurry?" It happens to all of us! Blurry pictures can be frustrating. Whether you're using your phone or a fancy camera, the question on your mind is probably, "How to take sharp pictures?"
In a world where photographs capture moments and memories, we all want our pictures to look great. We want them to be sharp, like a crystal-clear window to the past. So, today, let's dive into the world of blurry photos. We'll figure out why they happen and learn some simple tricks to make your photos sharp and awesome.
It's time to discover the secrets and improve your photo skills — one clear picture at a time!
Importance of Clear Images in Photography
 Why do we care so much about clear, sharp pictures in photography, especially in the realm of sharp focus photography? Well, it's because sharp images have a superpower — they tell stories better. When a photo is sharp, every detail shines through. Faces look more expressive, landscapes feel more majestic, and special moments become more unforgettable.
Imagine looking at a picture of a birthday cake, and you can almost taste the frosting because it's so clear. Or a photo of a smiling friend, where you can see the sparkles in their eyes. That's the magic of sharp photos—they make your memories come alive.
Whether you're capturing a breathtaking sunset, your child's first steps, or simply sharing daily moments on social media, sharp photos make your photography stand out. They capture the essence of what you see and feel, making your pictures more engaging and memorable. So, if you want to create images that truly pop and leave an impression, understanding how to achieve sharpness is a must!
Bring Clarity to Your Photos with Supersharp AI
Experience NowBlurry vs. Clear Pictures: A Brief Preview of the Three Main Factors
 Before we jump into the secrets of taking sharp photos, let's take a sneak peek at the three main culprits behind the difference between a blurry and clear picture. Understanding these factors is like having a map that guides you toward photographic clarity:
Shutter Speed: This is like the blink of an eye for your camera. If it blinks too slowly, things can get blurry, especially if something is moving. We'll show you how to make it work right.
Aperture: Think of this like a magical window that decides what's clear and what's blurry in your photo. We'll show you how to control it to make sure your pictures look just the way you want.
Focus: Imagine a camera that needs glasses. Getting things in focus is like putting on those glasses. We'll help you figure out how to make your camera see clearly.
In the next parts, we'll explain these things in simple terms and give tips to make your photos go from blurry to super clear. Ready to become a photo pro? Let's do it!
Understanding the Causes of Blurriness

1. Shutter Speed

Shutter speed is a bit like how fast your camera blinks. It decides how long your camera's "eye" is open to take a picture. This blink time is super important for making your photos sharp or blurry.
Consider a simple example: Imagine you're taking a photo of a car speeding by. If your camera blinks really fast, it freezes the car in the picture, and you get a clear photo. But if the blink is slow, the car moves while the picture is taken, making it blurry. So, the speed of this blink can make your photo sharp or not.
When to Use Slow or Fast Shutter Speeds
Slow Shutter Speed: These are like magic for making dreamy pictures. They're great for things like capturing a silky waterfall or starry night sky with long streaks of light. Slow shutter speeds give your photos a cool sense of motion.
Fast Shutter Speed: When things are happening fast, and you want to capture them clearly, like a soccer player kicking a ball or your pet running around, you need a fast blink. It stops the action and gives you sharp pictures.
To make your photos look clear and not blurry, use a tripod when your camera blinks slowly, especially in low light. This keeps your camera still and stops your hands from making the picture shaky. When things are moving fast, like in sports, make your camera blink quickly. Some cameras even have a "Sports" mode that does this automatically for you.
2. Aperture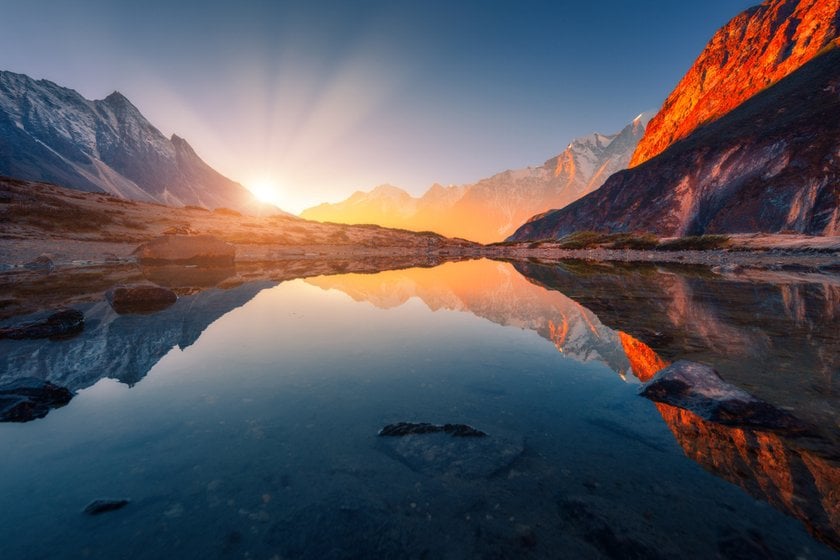

Understanding how to get sharp photos involves grasping the concept of aperture, which works like a special window in your camera. It's not just about controlling light; it also determines what's clear and what's blurry in your picture, known as the "depth of field."
Picture it as adjusting the size of a window:
Wide Aperture (Low f-number): Think of this as a wide-open window. It lets in a lot of light, creating a beautiful blur background of a picture, perfect for portraits where you want your subject to stand out (that's the cool "bokeh" effect).
Medium Aperture (Mid-range f-number): This is like a versatile all-rounder. It suits various situations, from family gatherings to street scenes. It keeps both your subject and background reasonably clear.
Small Aperture (High f-number): Picture this as a tiny window. It allows less light but ensures everything in your photo is sharp. Great for landscapes or architectural shots where you want every detail crystal clear.
To make your photos look sharp, you can use your camera's "Aperture Priority" mode. It lets you choose the size of the camera's window (aperture), and the camera figures out the rest. Also, try taking the same picture with different window sizes (apertures) to see how it changes your photo. It's like trying on different glasses to see what looks best. This way, you can make sure your pictures are nice and clear.
Remember, choosing the right aperture isn't just about sharpness but also about conveying the mood and story you want in your photo. So, with this aperture knowledge, you're on your way to capturing the perfect shot, whether it's a stunning landscape or a captivating portrait, and mastering how to get sharp photos becomes an artful skill.
Master the Art of Photo Clarity with AI-powered Sharpen Tool
Explore in Luminar Neo!3. Focus

In photography, making sure your pictures are clear and sharp is a big deal. It's like making sure your camera's "eye" is looking at the right thing. When you do this well, your pictures tell the story you want them to tell.
Getting the focus right is like ensuring your main character is in the spotlight and everything else is in the background. It helps your viewers know where to look in your photo and makes your pictures more powerful.
Manual vs. Autofocus: What to Choose?
Think of this as two ways to find your way. Manual focus is like steering your own car, giving you control. Autofocus is like having a map that tells you where to go. Use manual focus when you want to be very sure, especially in tricky situations. Autofocus is quick and works well for everyday photos.
To capture sharp photos, remember not to depend solely on autofocus, especially in challenging conditions where it might make mistakes; switching to manual focus is handy then. Always double-check where your camera is focusing, much like aiming a bullseye. Ensure it's on the right spot, such as a person's eyes for portraits, to keep your subject sharp. And when you're focusing manually, take your time and hold the camera steady; rushing can lead to blurry photos.
Post-Processing for Sharpness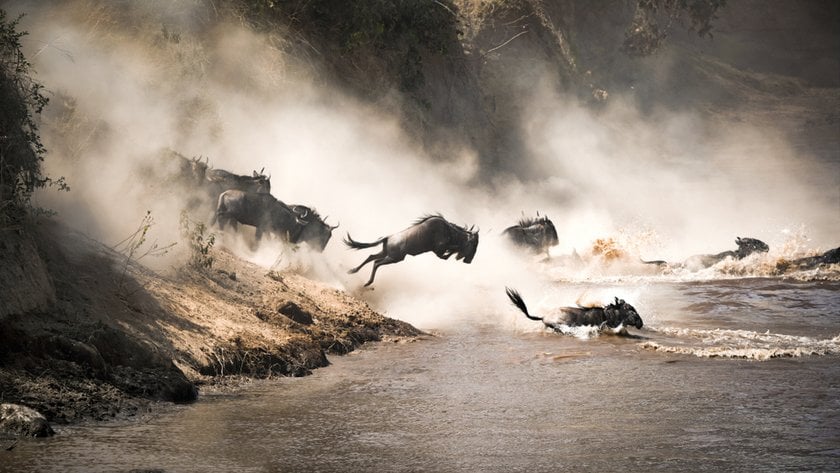

Once you've captured your photos with care and attention, the journey to achieving razor-sharp results doesn't stop there.
Post-processing, the art of refining your images after they're taken, plays a pivotal role in enhancing sharpness and bringing out the finer details. As discussed in The Most Popular Photo Editing Styles: 2023 Review, different editing styles, and techniques can significantly impact how you approach post-processing to achieve your desired sharpness.
In the world of post-processing tools like AI Image Sharpener in Luminar Neo, you'll discover a powerful ally! It's like a digital magnifying glass that can make your photos even crisper and more detailed. Let’s discover how to use it!
Quick Guide: Using Sharpener AI in Luminar Neo
Access Sharpener AI: Download the Supersharp AI Extension for Luminar Neo from the Extras tab and go to the Edit tab to start.
Choose Sharpening Mode: Select either General Sharpening for reducing blur or Motion Sharpening for dynamic shots.
Set Sharpening Strength: Pick from Low, Middle, or High for your desired level of sharpness.
Let AI Work: Allow a few seconds for the AI to analyze and enhance your image.
Finalize: Save or export your sharper image for sharing or further use.
Download Luminar Neo and Get a 7-day Free Trial
I'm in!Conclusion
In our journey to capture sharper photos and learn how to make photos not blurry, we've uncovered the secrets behind those hazy images. We've learned that sharp photos bring our memories to life thanks to shutter speed, aperture, and focus. Plus, we've found a handy tool, AI Image Sharpener in Luminar Neo, for extra crispness!
With this knowledge, taking clear and captivating photos becomes a breeze, making every picture a vivid window to our cherished moments and stories!