Working with hundreds of photos and you're just sick of the chore, such as adding the same filters to hundreds of prints to end up with 3-5 frames?
There is a very easy way to simplify your work, and that is Lightroom. In our little guide, we'll tell you how to edit multiple photos in Lightroom and a lot of other exciting information that can help you in this kind of work.
Lightroom has a variety of ways to batch-process photos. Let's consider them in detail so that you can choose the most convenient one in each case. Now let's discover how to batch edit in Lightroom.
Let’s Start With the Definition
 Batch editing in Lightroom is the ability to create a preset of settings that will apply to an unlimited number of files. This can be very useful for those who work with photo processing. The possibility of editing multiple photos in Lightroom is a clear advantage of this photo editor. Thanks to this useful feature, professional photographers who shoot more than a hundred photos at photo shoots or holidays can significantly save time. To make a basic Lightroom batch processing package of images in a short period it is enough to set the settings competently.
In the photo editor, you can even create individual settings and apply Lightroom preset to multiple photos. The program is a handy cataloger, so you can quickly sort your images into categories, delete unsuccessful ones and prepare them for retouching.
How To Batch Edit Your Photos In Lightroom?
 The main editing tools are in the "Edit" panel. , which can also be accessed by pressing the E key on the keyboard. The first batch of sliders is for the brightness and contrast of your single image. Drag the sliders left and right to make your adjustments. Hold down the Alt key as you drag to see the point where your highlights and shadows begin to crop. Click the header for each slider to reset it. Next, we'll describe each method in more detail.
How to apply the same edits in Lightroom? Batch processing is used when you need to process more than two images that were taken at the same camera settings, and the light and exposure do not change. Such retouching significantly reduces the time required to process many photos. How to add preset to multiple photos in Lightroom? To batch process a photo you need to make changes to one photo taken as a sample.
Using the Develop tab, edit settings to the photo, and set the light/shadow, exposure, and contrast. After that, go to Library and go to view mode. You need to select the processed image, and then all the other photos you want to apply changes to. Click the Sync Settings button to apply the settings to the selected photo.
First Method
 At the bottom of the left panel of the Develop module, there are two buttons Copy... and Paste. With their help, it is convenient to transfer your favorite settings between images.
- Process the photo.
- Click Copy... button.
- In the window that opens select the necessary settings and click Copy.
- Move to the photo where you want to paste your settings and click Paste.
- Even more convenient for this purpose is to use the hotkeys Ctrl+Shift+C - copy settings, and Ctrl+Shift+V - paste settings.
Sync Setting
 Synchronization is needed to transfer processing to many images at once. Process a photo.
- Use Shift (or Ctrl) to select the photos you want to process similarly.
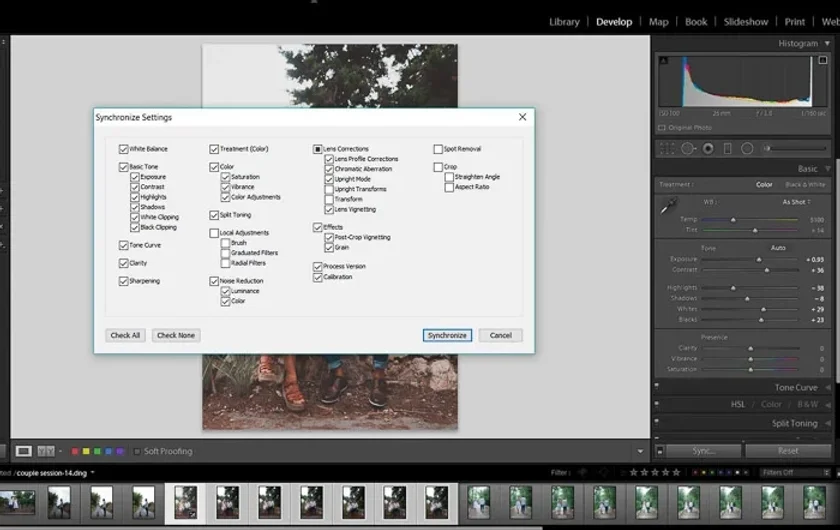
- Press the Sync... button. It will appear instead of the Previous button when you select several files (or press Ctrl+Shift+S).
- In the window that appears, check the settings you want to synchronize and press Synchronize.
Voila! All the selected files will be processed like the first one.
It should be noted that when you click Sync... the settings from the "key" frame will be copied, i.e. the selected from the selected ones.
There is an option for simplified synchronization, before pressing the Sync... button press Alt and the button will change to Sync. In this case, Lightroom will not show the settings selection window but will synchronize the files immediately. The settings you selected last time will be selected.
Auto Sync
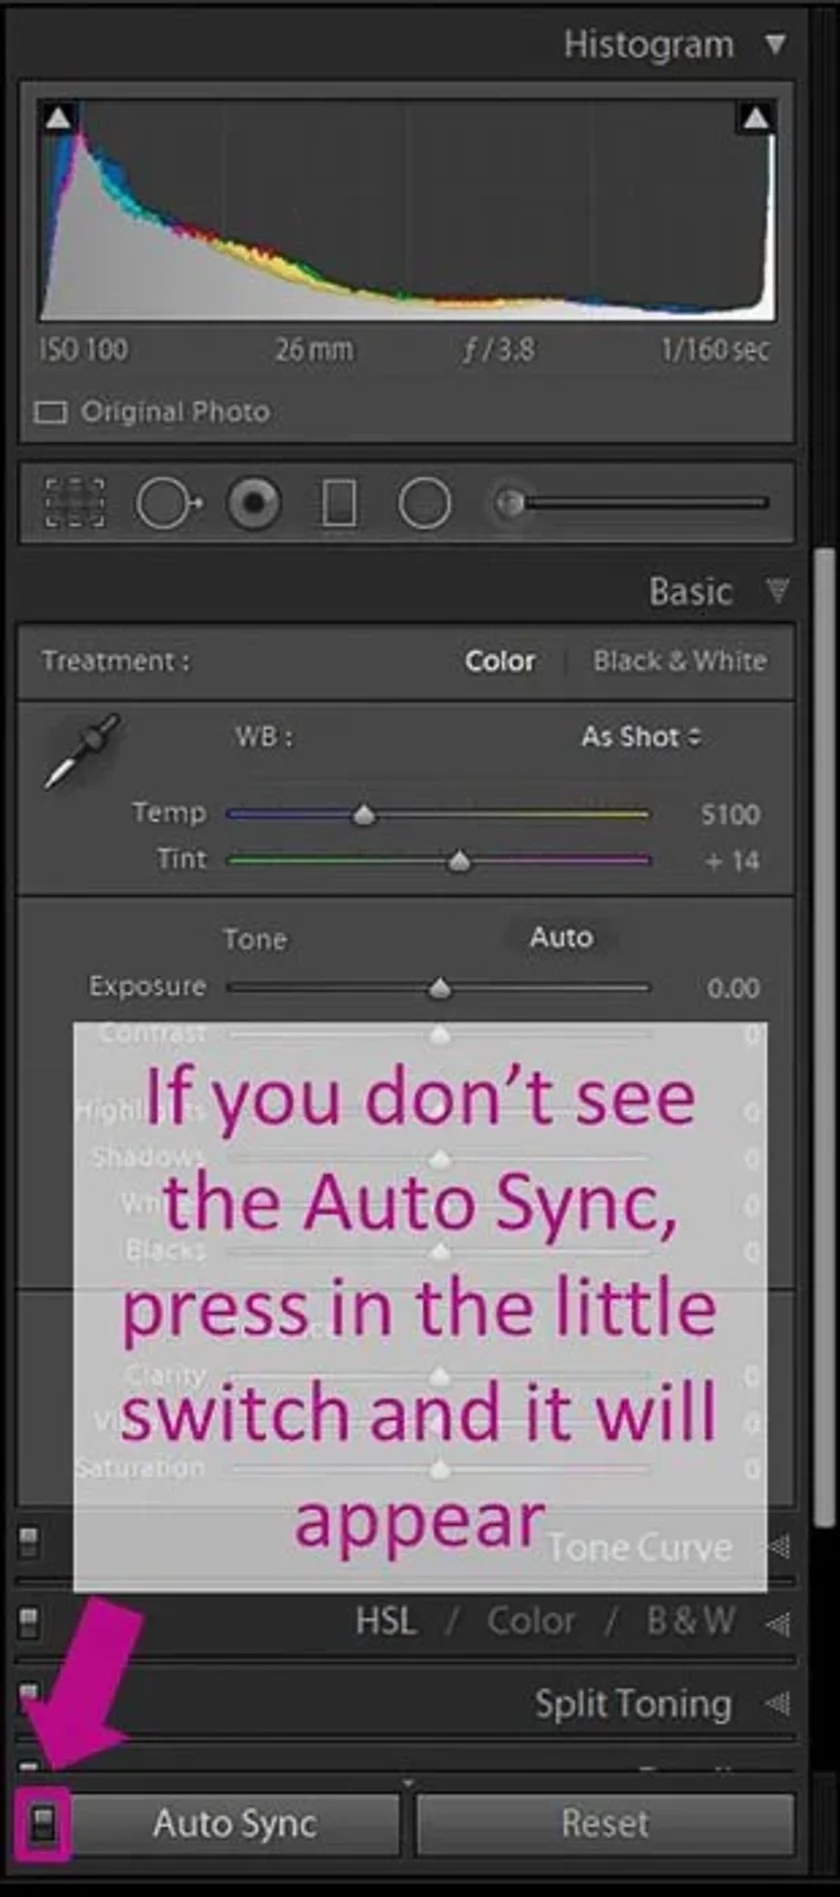 Another quick way how to batch process in Lightroom is to use the Auto Sync mode. Highlight the photos you want on the Frame Ribbon. Press Ctrl, (this will change the Sync... button to Auto Sync), and click this button - Auto Sync. This will lock the button in this state. Now all selected files will be processed synchronously!
You can deselect, and select other files, Lightroom will still work in this mode. To get out of it, just click the Auto Sync button again.
There are two unpleasant things about this mode. First, the local tools Graduated Filter and Adjustment Brush do not work. Thus, in this mode, you can not synchronously darken the sky in all the pictures, which would be convenient for panoramas. The Gradient Filter and Brush for multiple files can be applied with normal synchronization. However, cropping and stamping work adequately in this mode, and the effect appears on all selected photos.
The second unpleasant moment is the work with history. If you use the History panel to return to the previous state of the picture, the return will occur only for the current frame, all other pictures do not return!
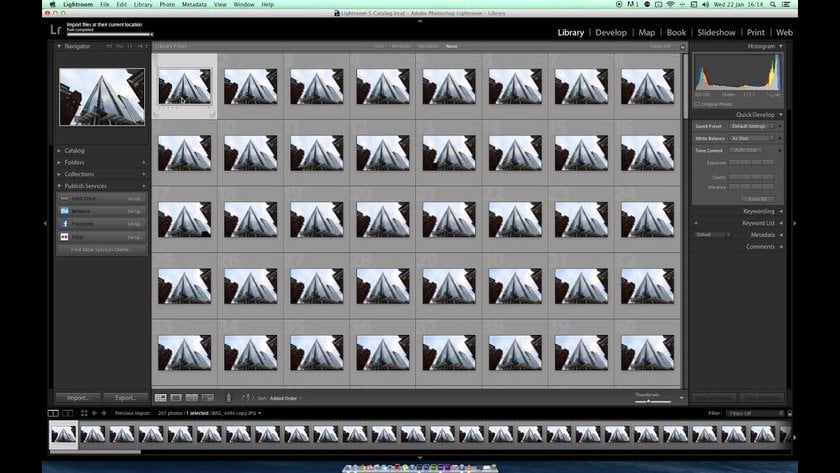
After importing photos, they are displayed as thumbnails (Grid mode) in the Library module. Already here you can process photos in bulk. To do this, select all the photos you want, and use the Quick Develop settings (it unfolds) to make the necessary adjustments. The changes will affect all the selected photos. This can be handy when, for example, you have several photos made with the wrong exposure correction, and you want to assess whether they are suitable for something or whether you will have to delete them without going to the Develop module).
This works in thumbnail mode, but if you are viewing a photo in full-screen mode (Loupe View), even highlighting the desired images on the "frame strip" you will change only one photo you are viewing. To apply the settings to all selected photos, click the Sync Settings button on the right panel of the Library module. A window will appear in which you need to tick the parameters that you want to synchronize. After that by pressing the Synchronize button in this window, you want to copy and paste the necessary settings to all selected frames.
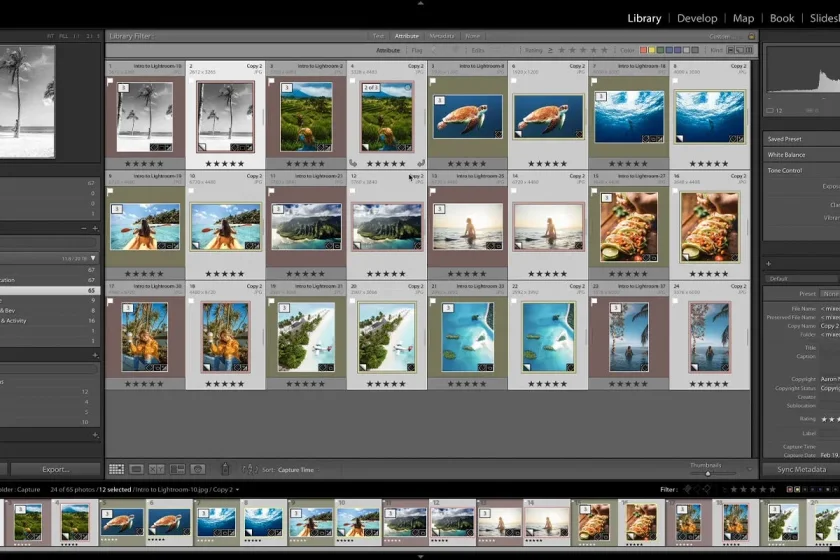
Here we need to make a little clarification. In Lightroom, you can select (highlight) multiple shots, but among the selected ones there will be one that is selected more than the others! (Reminds me of the saying, "All men are equal before the law, but some are more equal than others"). This selected one has a lighter border around the shot, lighter than the other frames.
How To Apply an Edit to Multiple Photos in Lightroom Mobile
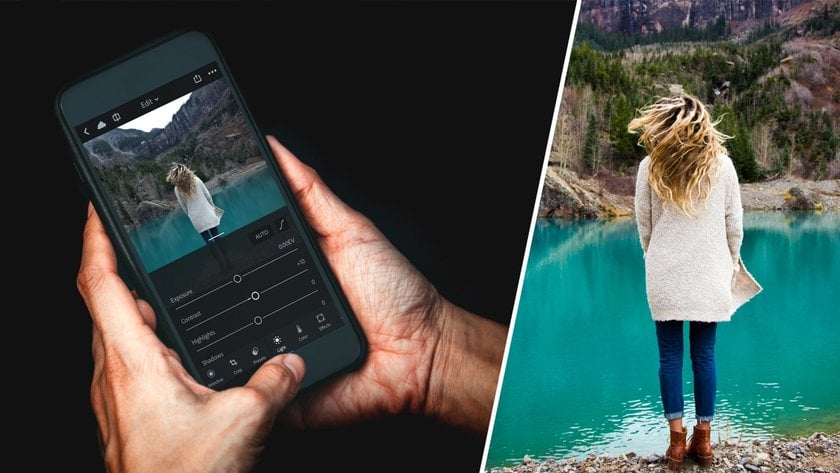
So, how do a batch edit photos on your mobile devices? With each new version of the program, the algorithms of automatic settings work more and more perfectly. Auto adjustments can save you time these days. Try using Auto Tone (exposure, dynamic range, white and black point settings) or Auto White Balance (auto white balance). In the Develop window, you select the Auto White Balance value for each photo separately. If you go to the Library tab, select all photos, and choose Quick Develop White Balance – auto in the panel, the white balance will change to auto for all frames at once. Similarly, in the Library tab, Auto Tone is applied.
Note, if you have a photo with mixed light or the program mistakenly thinks that the frame is bad, the automatic white balance may give out a distorted version by color. In this case, it makes sense to select in Library not all frames, but a large number of photos similar to shooting conditions, and to apply auto-tuning only to them. If it got worse, press Ctrl+Z and adjust the white balance manually.
If you want to save time while applying preset to multiple images in Lightroom, you can also use auto-tuning transformation. For different kinds of frames, you can try different transformation options (Auto, Level, Vertical, Full) and choose the one that suits you best.
Luminar Neo – Easy Batch Editing Software
Batch edits in Lightroom are very handy, but we want to tell you about another amazing option. Luminar Neo photo editor is becoming more and more popular, thanks to its huge set of tools, artificial intelligence editing assistance, and the power of the application. Everything you can do with Lightroom, you can do faster with Luminar Neo and now we will tell you how.
You need to select a picture from those in your folder. After that you can go two ways:
- Go to the "Presets" tab and select the appropriate one.
- Start editing from the beginning. To do this, select "Edit" at the top of the application window and use the tools you need.
When you like the changes you've made, you can create your own preset for them. To save the style, select "Actions", then you need to select "Save As Preset" at the bottom of the application window and come up with a name for it.
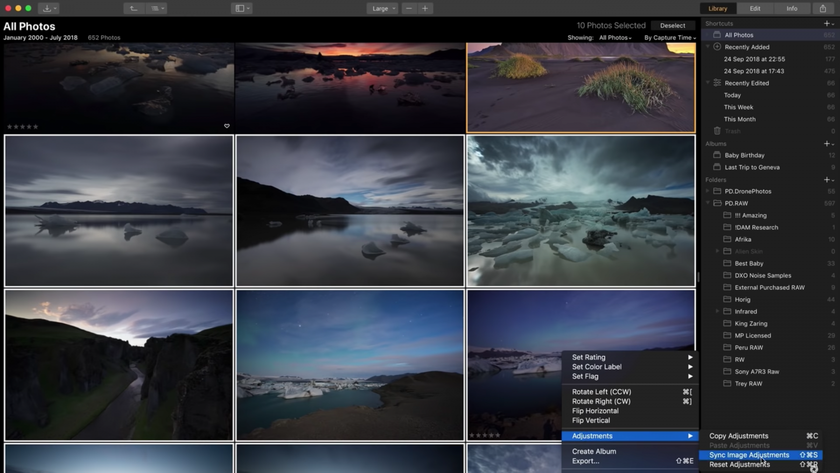
After that, you will see that the thumbnail of the picture you selected has changed because your style has been applied to it. To make a group edit, select other images. You can mark one or more of them. In the first case, click with the mouse while pressing CTRL (CMD), in the second case, select the initial image, then, while holding down the Shift key, select the last one in the sequence.
After that, you need to apply the changes. This is easy: you have to right-click on a selected image and go to Adjustments, and after that click on Sync Adjustments.
In order to perform a batch export, you need to go to "File" and then "Export". A dialog box opens in which you can select the folder to export to. The next step is to configure the settings. Click "Save" and the export process will begin.
Final Thoughts
As you can see after reading our little tutorial about how to apply a preset to multiple photos in Lightroom, there is nothing complicated about batch photo editing you just have to be a little bit patient and you will succeed.
Using this technique, you can greatly simplify your editing workflow and save a significant amount of time and effort even if you use a simple online photo editor. The ability to automatically apply Lightroom presets to multiple photos simultaneously allows you to achieve consistent and coherent processing of a series of images, providing a professional and polished look. Whether you're a professional photographer with a large volume of images to process or an enthusiast looking to improve your personal photo collection, mastering the batch process in Lightroom is an invaluable skill. It allows you to effectively edit and enhance multiple pictures at once, making your work more efficient and allowing you to focus on the other creative aspects of your photography. Moreover, with Lightroom's extensive library of presets available online, you can explore a wide range of styles and aesthetics, finding the perfect look for your photos in just a few clicks. So, armed with the knowledge of batch photo editing, you can take on even the most complex projects with confidence, knowing that you have a powerful tool at your disposal.
We hope that this knowledge will not only make your work easier but also inspire you to experiment and push the boundaries of your creative expression.
Experience the Power of Luminar Neo

Lightroom batch edit is great, but if you need more advanced features, we advise you to try Luminar Neo. It is one of the best photo editors that has gained significant popularity among professionals and beginners alike. This app takes image processing to new heights with its powerful and intuitive tools. With an emphasis on AI-powered instruments and cutting-edge technologies, Luminar Neo offers a seamless and efficient editing experience. From enhancing colors and tones to applying complex adjustments and effects like AI image sharpening, it provides a wide range of creative possibilities. With its user-friendly interface, the app empowers photographers and artists to bring their visions to life with ease and precision. Whether you're a professional looking to streamline your editing process or an enthusiast exploring new creative avenues, this software proves to be a valuable tool in your digital editing arsenal.
Check Out Luminar Neo Now

To take full advantage of AI picture enhance features in Luminar Neo, all you have to do is select one of the suggested plans and start processing your images. You can see firsthand that you don't have to use Lightroom Classic to batch-process your images. Apply edits to multiple photos, and use the best AI tools, all thanks to Luminar Neo! The software is available for Mac and Windows PC users. Don't waste your time, try it now!
FAQ
What Is Batch Editing in Lightroom?
Batch editing refers to the process of applying the same adjustments or presets to multiple photos simultaneously. It allows you to save time and maintain consistency by editing a group of images in one go, rather than editing each photo individually. By selecting a group of pictures and applying desired adjustments or presets, you can quickly enhance the overall look of your images.
How Can Batch Editing Benefit My Photo Editing Workflow?
It can save you time and provide an easy and convenient workflow. Instead of manually editing each picture individually, you can select a group of photos you'd like to apply the same adjustments or presets to and learn how to batch edit them. This allows you to streamline the process, making it faster and more efficient.
Can I Customize Adjustments for Individual Images While Lightroom Bulk Edits?
Yes, you can customize adjustments for individual images while using Lightroom batch processing. While applying presets to a group of photos, the app allows you to make additional modifications to individual images if you want to edit them differently from the rest. This flexibility ensures that you can still tailor the editing to suit specific needs while taking advantage of the efficiency of batch processing capabilities.